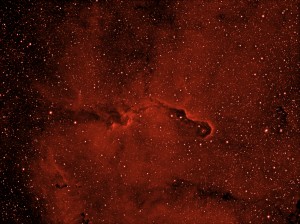
Elephants Trunk Nebula in Hydrogen Alpha

The Elephants Trunk took me a while to find with the small field of view of my Atik 314L+ CCD camera. I imaged it with just a Hydrogen Alpha (Ha) filter and I
took 10 minute exposures and stacked together about 10 of these.

The image was taken using one of my new telescopes, the Altair Astro Lightwave 80mm Triplet. I autoguided using a Skywatcher 9×50 finderscope with a QHY5 camera attached.

Elephants Trunk Nebula

What to Image in October

This is an imaging list for myself to follow. The reason it does not include all objects may be due to my surrounding garden views or that some distant objects are just too small for my telescopes.

M31 Andromeda Galaxy
M52 M52 and Bubble Nebula
IC5146 Cocoon Nebula
NGC7317 Stephan’s Quintet
IC1396 Elephants Trunk

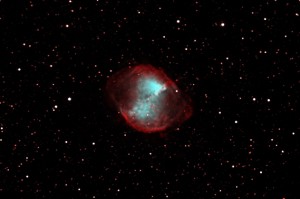
M27 Dumbbell Nebula Image

I have imaged M27 before using RGB filters, but this time I decided to use narrowband filters. I used Hydrogen Alpha (Ha) and Oxygen III (OIII).

This image was taken on a Meade 127mm triplet telescope with an Atik 314L+ CCD camera. The exposures were 3 minutes long each, about 10 of Ha and 10 of OIII were stacked and aligned.

I then mapped Ha to Red, and the OIII to both Green and Blue.

What to Image in September

This is an imaging list for myself to follow. The reason it does not include all objects may be due to my surrounding garden views or that some distant objects are just too small for my telescopes.

NGC6888 Crescent Nebula
NGC6946 Firework Galaxy
NGC6960 Witches Broom
NGC6992 Network Nebula (Eastern Loop)
NGC7000 North American Nebula
IC5070 Pelican Nebula
IC5146 Cocoon Nebula
NGC7023 Iris Nebula
M2 Globular Cluster
M15 Globular Cluster
M27 Dumbbell Nebula
IC1396 Elephants Trunk

Deep Sky Imaging Talk at CAA

Last night I did my first talk at the CAA on Deep Sky Imaging with a live demo in Maxim and Photoshop with M42. Amazingly I managed to fit my talk into 30 minutes, although I did feel like a horse galloping at the Grand National. I think I must have spoken quite quickly.

For anybody that wants a copy of the slides, here they are in PDF format.

Deep Sky Imaging Talk (4 MB)

Concrete Delivery for the Pier Base

Today the concrete was delivered by Gemmix. This time the concrete was not delivered pre-mixed but actually mixed on site, as you need it. This is a brilliant way to go as you only pay for what you need. I asked for a C35 mix again, but an equivalent mix called a P340 was used.

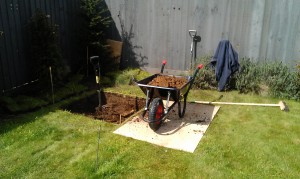
We built a level frame out of wood for the pier base, and then began wheelbarrowing the 20 or so loads it took to fill the hole. My Dad levelled out the pier base and used a board to flatten it and then a float to get it nice and smooth.

I actually used about 4 barrow loads more than my cubic metre I ordered, so the bill in the end for the delivery was £211.20 inc VAT, originally the cubic metre was priced at £182 inc VAT.

The mixture is now setting and should take about a week to completely set, so next up is the slab laying and drilling the pier holes in a few days time.

Digging the hole for the pier base

As I have just moved to a new house, it was now time again to build the shed observatory.

I did all this about 3 years ago, so it does not seem that long ago, plus this time it should be a lot easier as the shed is in pieces, with the pent shed observatory all ready to go and the insides of the shed are all ready and in pieces, so in a  way it’s like putting a jigsaw together.

The shed is again going to face north/south, with the door being on the northern side, I mapped out the location in the garden for it in the corner. Making sure to check that the opening of the roof had enough room to open so it did not hit and cleared the neighbours fence on one side.

Again I was going to dig a 1 cubic metre hole, so I began by ordering a skip, last time I had a 2 yard skip, but I remember that the smaller skips don’t have an opening. So you can’t walk into the skip with the wheelbarrow and dump the soil. So this time I ordered a 3 yard skip, this does not have opening doors either, but it does have low ends, which means you can use a plank to walk the wheelbarrow into the skip. Just to note I paid £95 for the skip.

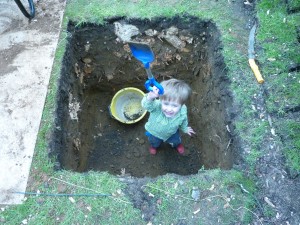
I knew there used to be a tree in the corner I was digging, but was amazed to find a lot of the tree roots just underneath the turf line. I actually started using a jigsaw to cut through the smaller roots, but there was also roots as thick as my leg. This meant that I had to borrow my dads longhandled axe to get through them all, which was hard work,

I suppose one good thing about digging around the base of a tree is that the soil was pretty good condition, as last time I dug this hole I went through builders rubble, brown clay and then grey clay at my old house.

Next it’s time to order the concrete.


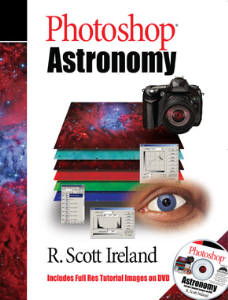
Photoshop Astronomy Book Review

Photoshop AstronomyPhotoshop can be a hard program to get used to when it comes to preparing your astronomy images. Plus there are so many shortcuts and ‘black box’ type actions that imagers must use to make the kind of ‘woweee’ type images. But where do you learn all the tips and tricks, there certainly are not many training courses (though the Ian King ones are good!) there are no DVDs, and hardly any books on the subject. But at last there is a book on using Photoshop for Astronomy.

The book begins by looking at the digital darkroom, and everything you have in it. This includes your monitor and how to colour calibrate it, external hard drives and photo printers and accessories. There is also a section describing the details of the various digital image file formats. At the end of this chapter there is a simple recommended image processing workflow.

Chapter Two covers colour management, and how to calibrate your monitor and your printer, soft proofing, and it covers the various colour models – such as RGB, CMYK and HSB.

Photoshop Astronomy is an amazingly detailed book on how to manipulate your astronomy images to get the best out of them. Each step is shown in great detail.

The only downside to the book is that none of the images are in colour, only black and white. When you are paying nearly £50 for the book new, you would have thought we could have had some colour images and screenshots.

A CD accompanies the Photoshop Astronomy book which includes lots of different images to work on in order to hone your imaging skills. The CD contains example images from Chapter 2 to Chapter 12. The author has also included the final images on the CD, so you can see how they should or could look once completed.

My copy of Photoshop Astronomy was purchased from SCS Astro

How To Add a Skywatcher Auto Focuser to a Skywatcher Equinox 66 Telescope

In the past I have attached the Skywatcher Auto Focusers to my Skywatcher ED120 and ED80 DS-Pro models, so as soon as I purchased a new Skywatcher Equinox 66 I immediately went out and purchased another Skywatcher Auto Focuser and set to work attaching it to my Equinox 66.

These simple jobs rarely are simple as I was about to find out. The main problem I previously had with the DS-Pro models was that you had to completely remove the focuser in order to attach the DC motor part to the pin part of the focuser. This time with the Equinox 66 this problem also occurred – but so did the issue that the bracket supplied with the Skywatcher Auto Focuser does not fit/line up with the screw holes found on the underneath of the Equinox 66.

But don’t worry with a couple of extra drill holes in the bracket and some bashing of the bracket with a hammer the attachment of the Skywatcher Auto Focuser to a Skywatcher Equinox 66mm telescope is possible.

Step 1:

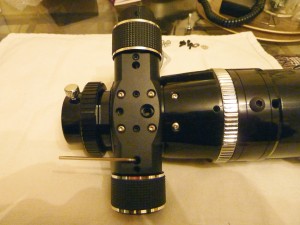
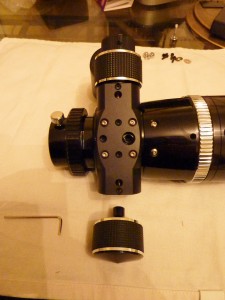
Remove the focuser knob from the single speed side of the telescope focuser by inserting an allen key into the hole of the focuser and loosening it.

Remove FocuserFocuser Removed

Step 2:

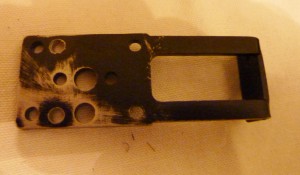
Drill the extra 2 holes required in the bracket so that they match the screw positions on the bottom of the Equinox 66.

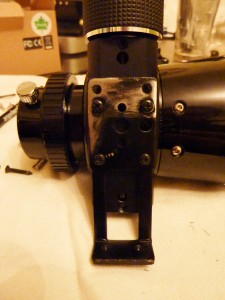
Focuser Bracket with Extra Holes drilled

Step 3:

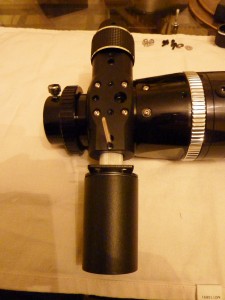
Now completely or as best you can loosen all the screws that attach the focuser to the telescope, you should then be able to move the focuser at an angle, or remove it completely. Slide on the DC motor onto the pin and tighten it with the supplied allen key. Make sure you tighten it in the right position by either laying the bracket in position or by actually fitting the bracket first to see if the screw holes line up between both parts.

Add DC Motor

Step 4:

With the motor in place now attach the bracket by using the 4 new screws supplied with the Auto Focuser. Be careful not to dislodge and lose the small rubber washers inside the telescope focuser when tightening everything up.

Add Bracket to Telescope

Step 5:

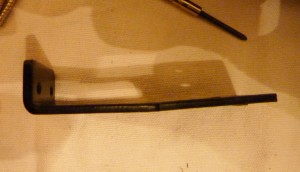
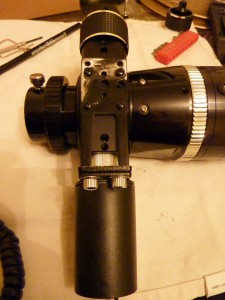
Now bring together the bracket and the DC motor and try screwing both parts together with the thumbscrews and metal washers provided with the Auto Focuser. If they do not align up very well, then you will need to remove the bracket and change the angle of the bracket to bend it to the correct position. I used a hammer for this.

Flatten bracket with hammer

Screw two brackets together

The End: You should now have it completed. Just try it out.

H-Alpha Image with DMK21-AU618

Received my new Imaging Source DMK21-AU618 camera the other day, today was my first chance to use it. There was a lot of cloud about today and I did not start imaging until 3pm which was a bit late in the day, but I am happy with the images I took.

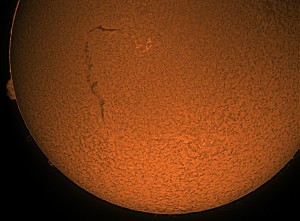
One thing I did try was a short C mount adaptor, as usually I use a 2.5x Powermate as I thought that was the only way to achieve focus on the Coronado PST. But now the short C mount does allow you to focus on the PST without the need of a Barlow. This now means that I can image a whole solar disc by stitching together just 3 images.

Sun with Coronado PST