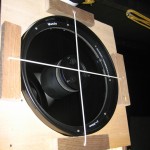
The Universe DVD

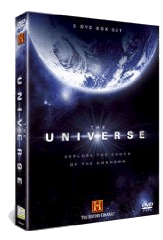
The Universe DVDOne of the best series on astronomy and the solar system for me has been The Universe from the History Channel. It is now available as a standard DVD and in Blu-Ray High Definition format.

There are currently 2 series you can buy, the first series is on 3 DVDs and so you get 600 mins of programmes. The 2nd series is even longer on 5 DVDs running for 842 minutes.

The second series of The Universe includes episodes: Alien Planets, Cosmic Holes, Mysteries of the Moon, The Milky Way, Alien Moons, Dark Matter, Astrobiology, Space Travel, Supernovas, Constellations, Unexplained Mysteries, Cosmic Collisions and Colonizing Space.

The Universe DVD series makes a perfect gift for any astronomer, space enthusiast or for educational use.

The Universe DVDs are available here.

Apollo 11 Manual by Haynes

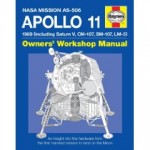
Haynes Apollo 11 Manual The Apollo 11 Manual by Haynes really caught my idea when reading the December 2009 edition of The Sky at Night magazine.

What a great and very unique gift for an astronomer, the acutal intricate manual to the Apollo 11 spacecraft in a Haynes style book.

This manual looks at the evolution and design of the mighty Saturn V rocket, the Command and Service Modules, and the Lunar Module. It describes the space suits worn by the crew and their special life support systems.

The book also tells you about how the Apollo 11 mission was flown – from launch procedures to ‘flying’ the Saturn V and the ‘LEM’, and from moon walking to the earth re-entry procedure.

Perfect for any astronomer or someone interested in space flight.

Buy the Haynes Apollo 11 Manual from Amazon with Free Delivery.

Vega Constellation

Tonight was my first night out for a while, I think the weather has been pretty terrible lately, or when it has been a clear night I have been doing something else, like my photography evening class.

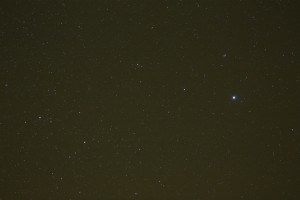
Anyway tonight I went out and decided to try out my homemade camera mount, which is on top of my guide scope.

I chose Vega for some reason, probably because I watched the film Contact the other night for the first time, and the signals from space came from Vega in the film.

I took a 30 second exposure on a 1600 ISO setting, using about 200mm lens, click on the image to enlarge it.

Constellation Vega

The Brightest Stars Book Review

The Brightest Stars Book The Brightest Stars book is all about twenty-one of the brightest stars visible from Earth. The Brightest Stars instructs you how to find the stars and the best way to see them.

Each section about each star contains information about the history of the star and legends that are connected with each star. There are also information on star distances, mass and composition. The book also includes star charts.

The Brightest Stars begins with a chapter on stars in the sky which asks the question How Bright is Bright? There is also information on the locations and yearly motions and names of the stars. The final part is about how to see stars better when looking at the skies, using your eyes and telescopes.

Chapter two is entitled Stars in the Universe which includes parts, structure, distances, and motions of stars in the universe, as well as the varieties of stars and the lives and death of stars.

The following stars are contained within the book; Sirius, Canopus, Alpha Centauri, Arcturus, Vega, Capella, Rigel, Procyon, Achernar, Betelgeuse, Beta Centauri, Alpha Crucis, Altair, Aldebaran, Spica, Antares, Pollux, Fomalhaut, Beta Crucis, Deneb and Regulus.

There are six appendices in total and a glossary in the book; with the appendices you get the positions of the stars via RA and Dec co-ordinates as well as magnitude measurements. You also get the masses of the stars and a list of the 200 brightest stars. There are also many other star information tables in the appendices.

The Brightest Stars is a great book if you want to learn a lot more about stars (obviously), the books images are in black and white though but it is nice that each star is given it’s own section which makes the book easier to read.

The Brightest Stars is available at Waterstones

Apollo Saturn V Model

Saturn V Rocket ModelGet up to speed with the Apollo Saturn V, the American rocket that blasted the three lunar explorers to the Moon.

This stunning Revell 1:96 scale replica is a life-like model that includes launch platform and supports, plus four paints, double ended brush and precision applicator glue for detailed decoration.

What a great model for someone this Christmas. I know it would take me quite a while to complete this model, probably last all Christmas into the New Year.

Buy the Saturn V Model Rocket

If you are interested in this type of space model, then there are lots of others in the Revell model range including:

How To Make a Wooden Camera Mount

Since getting my guiding telescope on top of my Meade LX200, I have run out of space to put other items around the telescope.

When you first get an LX200 telescope, you think there are lots of screws to use to add extras, but they soon get all used.

I currently have the Meade finder on the left hand side of the scope, the guiding scope in the middle on a rail and rings, on the right I have my Telrad.

The Telrad was originally stuck to the tube with some sticky padding although I wish I had never done this, so instead I drilled some holes into the Telrad base and screwed this into the tube. Because of all these items on the top of the scope, I then required weights on the underneath of the scope.

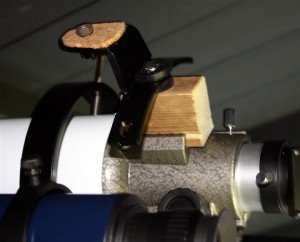
So, this means there is no space left for my DSLR camera, a bit of a pain if I want to do some normal widefield photography using my camera lenses. To get around this I decided to build a camera mount that would slot into the finder slot on the guiding telescope, which I was not using.

To do this I got myself a small piece of (1.5″ x 2″) wood which was about 2.5″ long.

I began by using a chisel to take out a line of wood where the finder mount would slide on, you could also do this with a screwdriver. The wood block will stay in place by using the screw on the finder mount on the telescope.

I then used the current metal camera mount I had and screwed this to the block of wood, between the metal camera mount and the piece of wood I did also add two rubber washers.

And that’s it, a simple way to add your camera onto your guiding scope.

Wooden Camera Mount in Finder Slot

How To Make a Diffraction Spike Mask

I have seen these pleasing images where the stars have spikes coming out of them, most notably on the pleiades (seven sisters) images.

I want to be able to get these in my images as well, and now I have found out how to get them by using a diffraction mask on my LX200.

Today I decided to make some by using some plywood left over from my observatory build.

Here is a list of the raw materials I used:

  1. Plywood
  2. 8x Screws
  3. Spare length of wood (24″)
  4. 2ft Washing Line
  5. Black Wood Paint (optional)

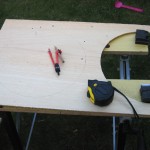
Cutting out the wrong size maskCutting the right size maskI began by taking the LX200 telescope metal cover and drawing a circle around that thinking that would be just right, although after then cutting it out with a jigsaw I found out that it was far too big.

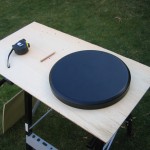
So I went back and just measured the diameter of the telescope and then found an old style school compass to draw the circle on the wood.

I then cut out the circle using my electric jigsaw.

I then cut down the piece of plywood into one manageable piece, with about 1.5 inches to spare around the sides of the hole.

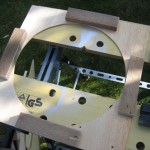
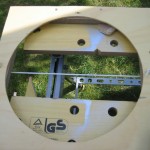
Adding all side woodNext I cut four lengths of some rough timber I had spare which was used on a previous gardening job. You don’t have to add this part, but I did because I wanted the mask to sit back from the front of the telescope, plus these pieces of wood at every side allowed me to make the mask fit snugly around the scope.

I then screwed the pieces of wood with 2 screws on each of the 4 pieces of wood, although I only used 1 screw on 2 pieces of wood so that I could still move the pieces of wood once the mask was on the telescope to fit them even more snugly against the scope.

Now go back to the telescope and place the mask on the front and mark on the blocks of wood you have just attached to the mask where the screws are on the LX200. You should have a screw in each of the four corners of the cover that holds the main front glass in place on the front of the telescope.

Doing this will mean that your washing line crosshairs will be exactly in the centre on the mask.

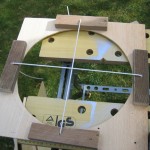
Adding washing line crosshairsI then cut 2 feet of washing line from our main home washing line, although you could go out and buy this. I then cut the 2 foot piece into 2 x 1ft pieces.  I tied a knot at one end of each pieces of the washing line.

Now drill holes with an electric drill all the way through the blocks of woods at the location you previously placed your telescope screw marks.

Thread the washing line through one of the holes. To hold the other end of the washing line in place I could have used wing nuts or bolts, but I did not have any, so I used a piece of dowelling, and hammered this into the holes to hold the washing line in place.

Diffraction spike mask completed unpaintedDiffraction spike mask on lx200I then tried the mask on the LX200 to make sure the washing line crosshairs were exactly centered.

On my first attempt they were not so I had to re-drill some more holes and re-thread the washing line, then they were perfect.

Here is the unpainted mask on my 10″ LX200 telescope.

I then painted the mask by using some black wood paint from Wilkinsons.

Hopefully I will now get the chance to try the diffraction spike mask out and see what images I get.

Damian Peach No Show at FAS 2009

Hi, Just returned from a day at the Cambridge Federation of Astronomical Societies Annual Convention. It was quite a nice and quiet day at the Cambridge campus.  I arrived just after the Dr Hayley Gomez talk, to be told on the door that Damian Peach was ill and would not be presenting.

It was really strange, as I was thinking what would I do if he did not show up, on my way to Cambridge in the car. Would I just ask for my £8 back and go home and do something else? Because I had only turned out to see Damian, but I stayed anyway and had a quick look around the stalls and luckily Jerry from Loughton AS stood in and gave a good old fashioned slide presentation instead.

After lunch, Chris Lintott spoke on Galaxy Zoo, the same talk he gave at Herstmonceux, but luckily I did not attend that talk. After that I then came home without waiting for Martin Ree’s talk.

I hope that the FAS still publish Damian Peach’s talk on the web as I would still like to read it, but I was gutted he did not show up along with several other people.

Bolting Down The Astronomy Pier

As you probably know I purchased an Astro Engineering Pro Pier and drilled the holes for the pier bolts at the time I laid the slabs for the base of the shed.

I had thought I was going to secure the bolts at the same time of laying the slabs, but I must admit got a bit scarred about doing it, and then kept putting it off. I then thought about doing it before the shed was erected, but then ended up doing it once the shed was completed inside and out, so in fact I made this the last of my jobs.

I used a bolt kit from Pulsar Optical which was around £35, it includes the four pier bolts, with washers, nuts and dome nuts. It also comes with a tube of gunk which has to be used with a mastik type gun.

I had previously hired an STS drill to drill out the holes, so I began by cleaning out the holes. To do this I attached a small tube to the end of an old vacuum cleaner to get to the bottom of the holes I had drilled.

Next I unscrewed the end of the gunk and found a metal clip around the inner plastic sleeve. I cut this metal clip off and then re-attached the nozzle and place the tube into the dispensing gun.

Now for me, on the first attempt the gunk did not set at all. I was deemed to have been very unlucky as inside the tube there are two colours which must mix together before they are squirted into the pier bolt holes.

For me, this not happen on my first attempt, it looked like one of the chemicals was restricted from leaving the tube. So I thought everything was ok ,so left it overnight and came back in the next day at lunchtime to find the bolts had not set in the groud at all. So off I went back to Pulsar Optical who were straight onto the phone to the manufacturers of the gunk and the MD of the company even phoned them back. The company offered to send a new tube of gunk and some metal cleaning brushes so that I could get the unset gunk out of the pier bolt holes. James at Pulsar Optical also provided me with another set of clean bolts, which was really good of them.

The next day I went back to pick up the cleaning brushes and the new tube of gunk. That evening at about 7.30pm I began again. Once I had cleaned out the holes I cut the metal end of the gunk off and put it in the gun holder. I then made sure this time that I could see the two chemicals mix inside the nozzle. Now it did take at least two full trigger squeezes in order to get a good mix of the chemicals.

I squirted the gunk into the holes one at a time, starting with the nozzle at the base of the holes and filled them to about 50% full. I then took my electric screwdriver and added an attachment so that I could screw the bolts into the gunk in the holes which is now very dense. This allows the gunk to get into the grooves of the bolts.

I repeated this for each of the four bolts in turn. You will find that a lot of gunk will spill over the holes, you just need to have a rag ready to clean this up.

I then lifted the pier over the bolts to make sure the bolts were in the right location. I then left the bolts overnight, and in the morning returned to find the bolts were completely rock solid in the ground.

I then cleaned the bolts up as some had some glue around them which would stop the nuts from been tightened. I just took a stanley knife and chipped away at the glue to clean them. I also removed the pier again, so that I could make sure I cleaned the bolts all the way to the floor as I did not want the glue on the bolts to stop the nuts being tightened as much as possible.

I then placed the pier back on the bolts and tightened them up. Job Done!

There are many different ways of completing this job, as I was advised not to lift the pier on and off the bolts, as the weight of the pier could dent the grooves on the bolts and render them useless, but for me this was not a problem. You could always make a wooden template and use that as a guide. I was worried that the bolts would not set in the correct position, as there is really no room for error, so placing the pier on top of the bolts seemed the most reliable method to me.
Jessops Camera Voucher Codes

I don’t usually publicise this sort of thing, but I have found some discount voucher codes for Jessops cameras online:

Use code CAMERAS8 – 8% off all compact digital cameras – Ends midnight 9th Oct

Use code NIKD300 – £30 off the Nikon D300 body – Ends midnight 2nd Oct

Use code NIKD300S – £50 off the Nikon D300S body – Ends midnight 2nd Oct

You can use these discount codes at Jessops now!