Completing the Observatory Roof
After painting the inside of the shed all black, all the jobs had been completed except for the setting the bolts in the ground (which is another post) but first I waited a week or so for my dad to come over and help me work on the roof.
We began by taking the roof off again, and first removing the felt. I then found out I had to undo a lot of my previous work and remove some plywood sheets and polystyrene sheets in order to get to the screws that were holding the roof on.
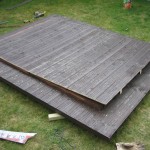 Next we decided on how large to make the overall hole in the roof. As the roof was tongue and groove wood, it was easier to let the jigsaw cut along where the wood joined itself.
Cutting out the roof was stressful, had I cut out enough? As this is a one time only cut.
We then removed the full piece of roof, but did not cut the roof in half until later on.
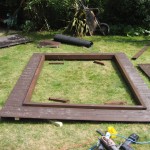 I had purchased two lengths of 4 inch by 3 inch planed wood to go inside the open roof, so creating a lip and so also giving me about an extra 5cm in roof height.
As the main beams of the roof ran in one direction, the 4×3 inch wood could be screwed into that, but on the other direction where there was nothing to attach to, I had to purchase a length of 2×2 treated wood to create some new beams, this also strengthened the roof some more.
Next came adding the felt back onto the roof in three strips and adding some beading wood to the outside to give the felt a tight fit, we also had to add extra wood to give the hinges something to sit on.
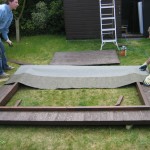 The hinges were from my local ironmonger in Streatham, Cambs. I actually first went for some small ones at 450mm long, costing only £8 for 2 pairs, but as soon as I looked at them overnight I knew they were too small, so I returned them the next day and upgraded them to the 600mm hinges which were a lot more money at £30 for 2 pairs, but they were definitely the correct ones.
We then cut the main roof into half, but not quite in half, because as we had now created an inner roof we did not need to full width of the roof, so took off one section of wood, which left one rof panel slightly longer than the other.
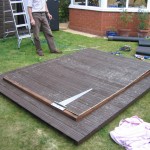 We adjusted the jigsaw blade to cut the roof in half at 45 degrees so I had a slanted section which had to open first (the telescope side of the roof).
At this point we put the roof felt onto the roof panels, and then put on the hinges, but later we found out that the roof felt was being pulled and tearing the felt. So we had to actually cut around the hinge (gate post) end to allow the roof to open up.
We also left an overhang of felt on the section roof which comes down last to keep the rain out of the roof join. I also had to put a large line of felt nails along this line to keep it in place, especially when the roof is open and the felt is upside down defying the laws of gravity.
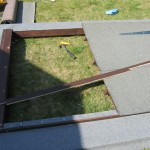 We then decided to put the roof back on, but not before taking off the roof panels, as now the complete roof was very very with all this extra wood we had added. So we put the roof outer on first, and then re-attached the roof panels afterwards.
To get around the problem of having a gap in the felt where the hinges are, I just put a loose line of felt over the top of the join, this was really going to be a makeshift thing just to keep out the next days forecast rain, but it has worked so well, I have left it in place.
The next day we did have a lot of rain and I stayed in the shed to watch for drips, and I had 4 leaks. They all came about because we moved the hinges once and left open holes. So I went onto the roof with some mastic in a gun and just filled the holes, and I have not had any leaks since.
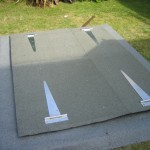 So now the roof was finished, but there was still lots more things to do, such as securing the two parts of the roof together, which I did with two black tower bolts, and fixing the opening roof panels to the main parts of the roof, which I did with brass cabin hooks.
I also found that the wide part of the hinge attachment had two screw holes that did not line up with the beam underneath, so I could not screw them to anything, so I purchased some small bolts and bolted them through the roof.
So now the roof was on, but I needed to work out how to open the roof. I have ended up purchasing some cheap plastic rope and two black metal handles which I put on each part of the roof section to tie the rope to.
I also purchased a small light 4 step ladder from Wilkinsons for £20 which allows me to open the roof from inside the shed and at the same time hold onto the rope which I also have on the inside of the shed and lower the roof down. Not forgetting that I had also added some roof stoppers on wood to the outside of the shed to hold up the roof panels when open.
To close the outside roof I stand up the ladder and push the roof closed and again lower it down with the outside rope.
There was still lots to do, such as setting the pier bolts and doing some more plywood work and painting as well as moving in.
