Tag : dmk21

QHY5 vs DMK21 for Guiding

I have always used my QHY5 for guiding, most of the time attached to a Skywatcher 9×50 finderscope and it has worked quite well.

But while at Kelling Heath this year I purchased an Altair Astro 80mm guidescope. Did I need to? I don’t know, may be a 60mm would have been a good upgrade as opposed to going for the larger 80mm. But anyway, I have now started to realise that the original QHY5 does suffer from some image degradation in the form of banding. (I do already use simple dark frames with the QHY5 camera).

Now instead of purchasing a QHY5 II Mono, I have been thinking about using my DMK21 AU618 camera instead.

I know the DMK21 sensor is half the size of the QHY5, so finding a guide star may be harder – but I bet the quality of the image will be a lot better. Plus it would mean I would not need to purchase a new camera but use the DMK21 that I already own.

So on the next clear night I shall try out the DMK21 for autoguiding and see what happens and report back.

UPDATE: 11th November 2014

Well last night I went out and tried the DMK21 for guiding. It worked OK, in Maxim DL the guiding calibrated OK. But the actual guiding itself was not that smooth, certainly not as smooth as when I use the QHY5.

I don’t think the small sensor and field of view is a major problem, as I found lots of stars in the field of view. But it could be because the DMK21 is only 640×480 – the sensor is so small you can’t bin the camera, so it lacks the sensitivity that you can get with the QHY5 camera when you bin the images as it’s 1280×1024 pixels.

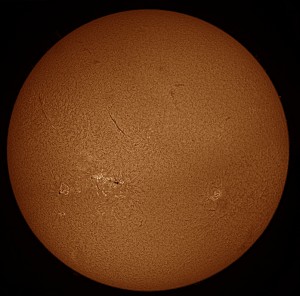
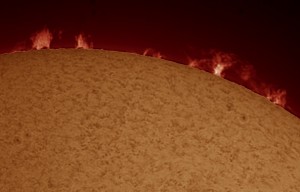
The Sun in Hydrogren Alpha with Coronado PST

This image of the Solar disc was taken on Saturday 6th July 2013. It was taken using a standard Coronado PST and an Imaging Source DMK21 AU618 Mono camera. I did use a Short ‘C’ mount adaptor in order to allow the PST to gain focus, without having to use a Barlow lens.

As the DMK21 is only 640×480 I have to take 4 videos and then process each one in turn using Registax 6. I then imported them into Photoshop and used the Photomerge software to align them all up into one image. I then gave the mono image some false colour.

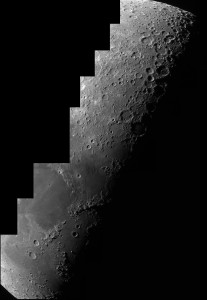
Moon Mosaic with Altair Astro 8″ GSO RC

This was my first proper night out really trying out my new GSO 8″ RC from Altair Astro. I had attached the Lakeside Focuser, collimated the scope to the other scopes, finders and red dot finder. I had also managed to get the telescope collimation as good as I could so far by using a Cheshire and by doing a star test.

I was playing around noting down the focus positions of eyepieces, my imaging set up and the DMK21. So I decided to try and do some moon video with it.

There were 8 videos, producing 8 pieces of the mosaic. I used a DMK21 618 camera on it’s own, no Barlows or Powermates were used. I processed them using Registax 6 and then started to align them manually in Photoshop, but then remembered there was an automatic way of doing it – Photomerge. Within about 30 seconds the mosaic was automatically created for me.

Moon Mosaic with Altair Astro 8" GSO RC and DMK21 Camera

Coronado PST Images

Well I went out and purchased a Coronado PST from ScopesNSkies the other week and was itching to try it out, but it seems since I have bought it, it’s now cloudy every day – typical! I did get to put it on my NEQ6 mount and do some imaging one Sunday morning though.

I used my Televue Powermate 2.5x with my DMK21 camera for these shots. The video was stacked using Registax 6.

These images show the Sun in Hydrogen Alpha or Ha. I think for the price of the scope it does not do a bad job. This a basic entry level version of the Coronado PST which can be purchased for just over £450 new.

I was not so happy with the first image, I took two images for this shot and then layered them in Photoshop, but to me they still look a bit fake, perhaps because I added the false colour first to each and then layered them, next time I will layer them first and then flatten the image and add the false colour.

Coronado PST Image 2.5x Powermate and DMK21

Coronado PST with Televue Powermate 2.5x and DMK21 Camera

But overall I am quite happy with my first efforts, I have also subsequently learnt how to take flats against the Sun, so I need to subtract the flats next time to remove the dust bunnies. Then I just need more Sun and more free time!

Moon Images with 5x Powermate

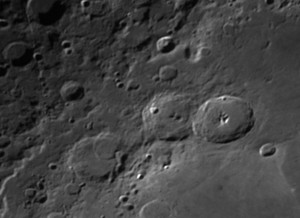
I decided to try and push my Skywatcher ED80 Pro to it’s limit on the moon. I am really impressed with my Skywatcher ED80 Pro telescope, as it gives me some nice widefield views, and I also use a Williams Optics version 3 flattener 0.8 which gives me even more view.

The Skywatcher gives me nice views of the Sun, Moon and Deep Sky Objects. I think the only thing that an 80mm type scope is not good at is planetary imaging and small Deep Sky Objects, like the Ring Nebula or Eskimo Nebula.

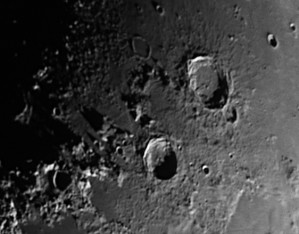
I was a bit worried that my 80mm scope would not cope well at imaging the lunar surface close-up. But I was pleasantly surprised that I managed these images with the scope.

The setup included the 0.8 William Optics flattener/reducer together with my Televue 5x Powermate and the DMK21 CCD camera.

Focusing was tricky, as the moon looked liked it was underwater from the atmospheric turbulence. But once I had stacked the images using Registax (version 6 is now out) they looked a lot better.

This time I also took a flat image, by using my EL panel which I have encased between 2 A4 acrylic sheets. I took a 1 second snapshot in the IC Capture software in order to get the flat image. I then opened it up in Photoshop and checked the histogram, and it was about nearly dead centre.

For the first time I then used Registax to stack the frames of the AVI videos with a flat frame selected. The results were good, as my DMK21 camera seems to have lots of dust bunnies in it, but I think most DMK cameras must suffer from this problem.

Moon with Televue Powermate

Theophilius and Cyrillus lunar craters

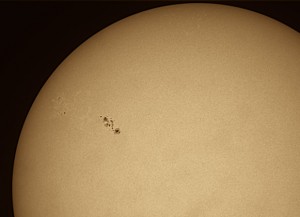
April 2011 Sunspots

As we have been having some nice summery weather in April, it gives us a great chance to get out in the garden and do some solar imaging.

I have recently had a major equipment change, and sold my LX200 (sad to see you go) and I now have an NEQ6 Pro mount instead, with my trusty Skywatcher ED80 Pro onboard.

Luckily there seems to be a good selection of sunspots now appearing. I tried imaging with a newly purchased QHY5 camera which I intend to use as a guide camera, but I thought I would give it a go on the Sun. It’s ok but not a patch on the DMK21 camera. I was struggling to get 10fps out of the QHY5.

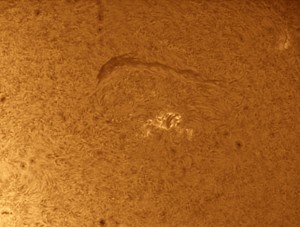
Solar Sunspot 24th April 2011This image was taken with the Mono DMK21 with a UV/IR filter and Baader Solar Continuum filter through the ED80 Pro and I used some cheap Baader Solar Filter paper which was taped to the inside of my scope plastic cover. Even though this solar paper has a scratch in it and a big fingerprint on it, it still manages to produce some great images, at about only 1 inch across. The exposure time is very low in order to get the detail. I then open it up in Photoshop and add some false colour.

My only problem at the moment is that the DMK21 has a lot of ‘dust bunnies’ in it, and I really need to take flats next time to get rid of them. As at the moment I have to get rid of them in Photoshop.

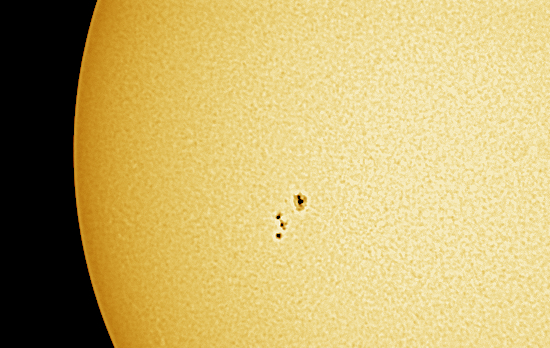
Solar Sunspots and Granulation

I managed to do a bit of imaging today as the Sun was out all day. I went and purchased a sheet of A4 Baader Solar Filter paper from Green Witch the other day, they were the cheapest place I could find, plus I got my SPA discount as well. It also gave me my first chance to visit them in Dry Drayton.

Anyway, I produced a couple of solar filters for my LX200 and my ED80 Pro from the paper sheet so was dying to try them out (which was a nightmare trying to cut, as I couldn’t stop my fingers leaving fingerprints on the paper, plus you need to remember to remove a really thin piece of plastic that is attached to the filter paper).

Both worked really well, I have also just purchased a 2nd hand DMK21 camera, which is so much better than my SPC900 webcam, which I about to sell. So imaging with this was fun as the more practice I get on the DMK21 the better. I also used my Baader Solar Continuum filter which I have had for ages but never really got to use as I did not think that the SPC900 gave enough brightness of the object to use a dark green filter, but the DMK21 handles it with ease as you have a lot more control over your gain, exposure and gamma settings.

The great thing was that I was able to record granulation on my images, something I could never do with the SPC900 webcam, maybe it’s the Baader Solar Filter paper that made it possible, but I think it was really the DMK21 camera.

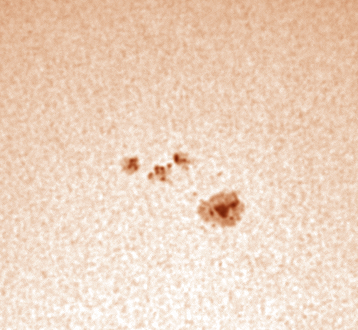
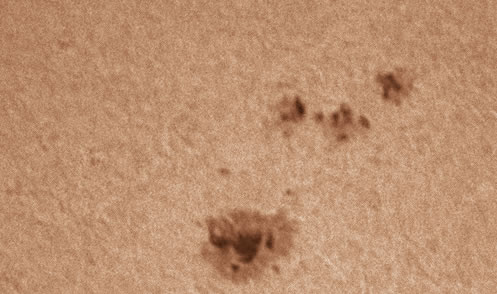
I processed them all in Registax 5 and then added some false colour in Fireworks. The distant image was taken with a Skywatcher ED80 Pro and the close-up shots with my 10″ LX200.

Sunspots via Skywatcher ED80 Pro

Sunspots via DMK21 and 10" LX200

Sunspots on 3rd June 2010 using 10" LX200