One Shot Colour Astronomical Imaging Book Review

One Shot Color Astronomical ImagingThe book begins describing in detail what a colour CCD is and how it works. The next chapters then go through all the equipment you will need to undertake astronomical imaging. including mounts, telescopes, dew prevention, light boxes.

The next chapters go into detail about planning your imaging sessions and getting your equipment setup. There is then a chapter on focusing and framing your objects. The book also gives a chapter over to calibration which includes taking dark frames and flat frames. How to take exposures and auto guiding is covered.

The next couple of chapters then go into some detail on how to process your images. Histograms, stacking images, luminance layers, calibration, and sharpening, blurring, deconvolution and digital development are all covered.

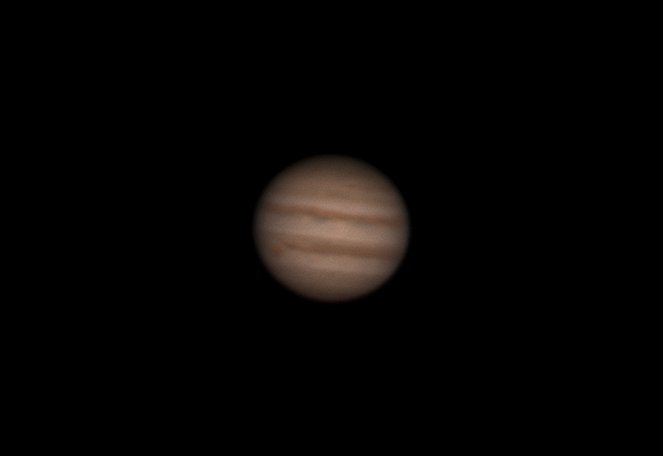
The final chapter covers imaging other objects including solar imaging, comets, asteroids, photometry, astrometry and hunting for supernovae. There is a nice glossary at the rear of the book together with a list of the Messier and Caldwell objects and how to find them.

It’s a shame the images in the book are in black and white, as having colour images would be a lot better. I also had a number of pages in my version of the book with badly printed images; a number of images had lines across them.

This is quite a new book published in 2012, but it does feel slightly dated in some places. The author has used a Meade LX200 in his images with screenshots from the Meade DSI software. I don’t think a lot of people use this camera anymore other than as a guider, as there are a lot better cameras now on the market. Another point that when talking about taking Mosaics, Photoshop is mentioned, but not that there is an automatic piece of software called ‘Photomerge’ that can create mosaics for you, or there is the free Microsoft ICE software.

But please don’t think One Shot Color Astronomical Imaging is just for people with colour CCD cameras or those with DSLR cameras, as the book contains lots of good advice and tips for any imager – even if you have a mono CCD camera. This is a great book for imaging as it takes through all the steps required in order to generate pleasing images.

One Shot Colour Astronomical Imaging is thoroughly recommended if you want a good overview of how to get into imaging no matter whether you have a mono or colour camera.


One Shot Colour Astronomical Imaging is available at Amazon

3000 Deep Sky Objects – An Annotated Catalogue Book Review

3000 Deep Sky ObjectsIn this book from Springer part of the Patrick Moore series, Ted Aranda has chosen 3000 objects that he viewed over a number of years using his own homemade binocular telescope.

The book contains a number of different objects including bright stars, double stars, variable stars, galaxies, globular clusters, nebulae, open clusters and planetary nebulae.

The book begins with an introduction on how to use the book, what the author used to view the objects and what each parameter means in the book and how to use the catalogue itself.

The main catalogue of objects is in the second part of the book, where you will find the objects divided into the seasons.

Each deep-sky object entry shows you the classification of the object e.g. ga for galaxy. You then get the astronomical catalogue number, the RA and Dec co-ordinates and in what constellation the object exists. Depending on what object you are looking at there is then more information. This may include visual magnitude, size, separation sizes for double stars etc.

Under each object there is then a description and further notes on the object written by the author.

At the rear of the book is an appendix about how to make your own star atlas, as well as a nice chapter on how to build your own binocular telescope with some good colour images of the author’s telescope. An index listed by object is also included at the end of the book.

Overall this is quite a thick book at over 550 pages and it contains many objects, it’s very thorough and nicely laid out. But this book is not really for me, I like a lot of colourful images to see what it is I should be looking at. I would have liked to have had less objects in the book but instead have images with most of them, even if they were just black and white images.

3000 Deep Sky Objects is available at Amazon

A Question and Answer Guide to Astronomy Book Review

A Question and Answer Guide to AstronomyA Question and Answer Guide to Astronomy book contains 250 astronomy questions and answers.

This is a brilliant book if you want to get to the bare facts about astronomy and learn simply about the main topics you want to know.

The book is divided into 10 sections, these are: Stars, The Solar System, The Earth, The Moon, Celestial phenomena, The Universe, Life in the Universe, History of astronomy, Telescopes and Amateur astronomy.

Each question is answered very well in simple terms and no answer is too long. Each answer comes with colour photographs or diagrams in most cases. This is really a book that you can read from cover to cover or just pick up for reference.

The type of questions in the book does vary a lot from the simple – Why do stars twinkle? to What is the anthropic principle? Are we alone in the universe? What are sunspots? Was there ever life on Mars?

I can thoroughly recommend “A Question and Answer Guide to Astronomy” – it’s a great book if you are interested in astronomy and want answers.

A Question and Answer Guide to Astronomy is available at Waterstones

Turn Left at Orion 4th Edition Book Review

Turn Left at OrionThe first editions of Turn Left at Orion were a massive best seller in the astronomy book category with over 100,000 copies sold. This is the latest 4th edition as of 2012. One of the major changes has been that this edition has been spiral bound, which makes it a lot easier to use when you are out in the dark, plus you are not going to break the spine of the book.

Turn Left at Orion is written for beginners with over 500 illustrations with large format diagrams showing how objects actually appear in telescope eyepieces.

Another good thing about Turn Left at Orion is that it includes both Northern and Southern hemispheres, so if you go on a long distance vacation to another hemisphere you can take the book with you and still use it.

The book begins with a few chapters on how to use the book and how to use your telescope, which are useful chapters for beginners. There is then a great chapter on The Moon. I best thing I like are the moon maps showing you details of the lunar surface for certain nights over the lunar months, there are also close-up images of certain features. A list of lunar eclipses worldwide up to 2025 is included.

There is then a section including all the planets including where to look in the sky for the planets during the year. The rest of the book is split into seasonal skies, divided into quarters. Each object shows you it via naked eye, then the view of the object in a finderscope, the view in a small telescope and the view in a Dobsonian telescope, with both these views duplicated showing what they would look like under a high powered eyepiece. Good descriptions of the objects are also included.

Don’t expect full colour images of the night sky objects, but there are still good sketched type pictures of the objects. Overall, I really like Turn Left at Orion especially if you want to learn the night sky. It’s also great if you want to know what objects will look like through various types of telescopes at various powers.

Turn Left at Orion is available at Waterstones

M81 Galaxy Image

This M81 image was actually taken in April 2013, just processed it in March 2014.

Taken on my Altair Astro 8″ RC Telescope on an EQ6 mount. Used my Atik 314L+ CCD camera and took LRGB frames with exposures of 5 minutes each. The scope had a x0.67 reducer fitted.

The focus could have been sharper, but at the time I had not really trained my FocusMax profile for this telescope very well.

Click on the image to see the full size version:

M81

EQ8 EQMOD and EQDIR Cables on Vista

My new EQ8 mount was delivered the other day and I noticed straightaway the handset port has changed since the EQ6 version which was a 9 pin serial RS232 type connection.

The new EQ8 handset connector is a standard Ethernet type connection. So this meant I needed a new EQDIR connection cable. Yes I know, I could have taken apart the EQ6 one and made my own cable. But this time I could not be bothered.

So anyway, I bought a HitecAstro EQDIR cable, the newer ones where there is no box of tricks, just a cable. These cables also work with the EQ5 and EQ6-AZ GT.

I started off installing the Prolific USB to Serial drivers, which I got from the HitecAstro support pages, and then I plugged in the cable into the PC and into the EQ8 mount. The cable was recognised by Vista and given a COM port number. Great so far!

I then fired up EQMOD Toolbox and tried to get the toolbox to find the COM port for me. But it could not find the COM port the computer had given the cable. This always worked for me, when on XP. So immediately I thought there was something wrong with the cable, had I bought the wrong one etc.

So I emailed HitecAstro and David Jackson replied nearly straight away, he then offered to phone me back and walk me through the set-up. That’s brilliant customer service. Well once I had provided my phone number to David and he phoned up I had sorted it out.

The problem was that the auto COM port selection just did not seem to work anymore – it must be Vista. I decided to choose my COM port and then just connect to EQMOD – and it worked!

So if the auto searching for the COM port does not find your mount port, then don’t worry straight away. Just select the one it should be and try it out.

Helios Nature Sport 7×50 Binoculars Review

Helios Naturesport BinocularsI already have a rather large pair of 15×70 binoculars. These are fine and give you a great view, but sometimes too much magnification, that you don’t know where you are in the sky. Plus they are also very heavy and you can’t keep them still in your hands for too long, they really need to be attached to a tripod.

So I wanted a pair of binoculars that were the complete opposite to the ones I have. So I went for the lowest power magnification I could find at 7x but I still wanted to gather a fair bit of light so went for 50mm objective lenses.

The Helios Nature sport 7×50 binoculars provided me with the specification I wanted, plus they were rubberised and quite light.

I did have a budget, but didn’t want a cheap pair as I am always worried about cheap binoculars and how they may easily go wrong. I paid £60 for the Helios Naturesport binoculars.

One of the major benefits was that these binoculars are ‘focus free’. There is no middle focuser on the binoculars. I think that’s a bonus, as that’s another part that can’t go wrong. The focus is fixed using a specially designed eyepiece that allows the image to be perfectly sharp from the near focus point of 20m to infinity.

I was amazed to see how these ‘focus free’ binoculars actually worked. When I bought them I only managed to look down a street in the daytime. But I was pleasantly surprised how sharp the view was to infinity and as close as 18m away.

The binoculars come with a padded carry case was well as end caps and cleaning cloth. They also have a binocular screw hole so you can connect them to a tripod if required.

The anti-reflection multi-coatings and BK7 optics (all lenses and prisms) deliver excellent light transmission and sharp high-contrast image replication.

So what are they like at night time for astronomy? Well, you can see Jupiter and its moons. You can easily see the Pleiades with a lot of sky around them. The moon is not that big but you can just make out the craters along the terminator. I would suggest more magnification if you want really good lunar views.

For an idea of what the field of view is like, you can fit the whole of Orion’s belt and sword into the field of view and make out the Orion Nebula.

The great thing is you don’t have to focus, just point them up to whatever you want and view! Easy.

Magnification: 7x
Brightness: 28.35
Twilight rate: 25.8
FOV: 114m @ 1000m,
Dimensions: 185 x 62 x 170mm
Weight: 780g
Close focus 15m

by Daniel Coe

Astrofest 2014 Discounts

Will we see a wide range of discounts at Astrofest in 2014? I do hope so, as there was very little discounting at Astrofest 2013.

Keep your eyes out this weekend for retailers who also offer astronomy discounts online as well as at the show, if you cannot make it.

So far I have found:

Cambridge University Press – discounts released Friday 7th February here: https://www.cambridge.org/gb/academic/conferences/astrofest-2014/

Telescope House – 10% off all in stock items (except Skywatcher telescopes and mounts nor megadeals) online or at the show.

First Light Optics – discounts on Skywatcher and Helios products for Stargazers Lounge users only with 50+ posts.

If you find more please tell me.

By Daniel Coe

Jupiter taken with DFK21

Jupiter January 2014

This was taken on Sunday 19th January 2014. I took it on my Altair Astro 8″ RC with a 2x Televue Barlow and an Imaging Source DFK21 (Colour Camera).

It took me a while to get the options in the ic Capture Imaging Source software correct, but then I stacked it in Registax 6.

I imaged for about 50 seconds at 60fps. But maybe only ended up using about 500 frames, the seeing was not great.

Upgrading the Observatory PC from Windows XP to Windows Vista

The support for Windows XP is finishing in April 2014. So really it was time to upgrade the observatory PC. I was previously using Windows XP Professional 32bit edition for quite a while in the observatory. I had no real issues with it, and I know a lot of people still use Windows XP on their Laptops or Desktop PC’s for running their observatories.

I had a spare copy of Windows Vista Business 64bit lying around, so I decided to use that, instead of paying £50 or more for a copy of Windows 7. Come to think of it, it would have been a lot more as I would ideally have wanted the Business edition of Windows 7 which can be quite pricey (as I like to remotely control the observatory PC from in the house by using Remote Desktop Connection and that’s only available if your Windows PC is the Business or Professional editions).

My main worry when upgrading was drivers, and especially 64bit drivers! I went for a clean install of Vista and after it was complete I was amazed to see that the internet was already connected (so the ethernet driver had been installed for me) and the sound was working (so sound driver installed OK), and it had installed the driver for my USB Hub PCI Card. As I use about 8-10 USB ports on my observatory PC.

A great surprise and my biggest worry was my old NVidia graphics card which runs 2 monitors, but once Vista started to do it’s hundreds of extra updates – which took it to  service pack 2, the graphics card was recognised and the driver came from Microsoft and everything worked.

So that was the basic drivers, now came the main astronomy software, namely:

ASCOM 6 Sp3EQMOD
FocusMax
QHY5 software
Atik drivers
Maxim DL
Lakeside Focuser drivers
Starlight Xpress filter wheel drivers
Imaging Source ICapture and Drivers

Before the install I had backed up my FocusMax settings, Maxim Configurations and my EQMOD settings (as my EQ6 mount was still parked).

I had no problems installing any of the software on Vista 64bit, and once the main software was installed I overwrote the default settings files with my own backed up ones.

The only problem I ran into was with the classic USB to Serial adaptor software drivers, as I have 3 of these. 1 for EQMOD, and 2 for the Lakeside Focusers. There are so many different USB to Serial adaptors. I bought mine from eBay. I kept the original CD driver disks, but there are usually newer drivers if you know where to look and make sure you get the correct driver – as there seem to be hundreds of different ones.

Then it was a matter of checking which adaptor was set to which COM port and then telling EQMOD and the Lakside ASCOM software which COM ports these were. I then fired up Maxim and checked all the connections worked to the cameras (QHY5 and Atik 314L+), filter wheel and EQMOD.

Early days yet, as there is no real test like actually opening the observatory roof up and doing some observing or imaging to really test the software and Vista 64bit.

I am glad I left the PC in the observatory whilst doing the upgrade, as it meant I did not need to unplug any of the many cables in the back of the PC. Plus as it was a Professional version of Windows I could go into the house and use Remote Desktop Connection to remotely install and test the software without sitting in the observatory.

Now I shall stick to Windows Vista until they drop support for that, which hopefully will be a while yet. Then I suppose I shall be installing Windows 7 Business 64bit.

BTW my PC specifications are: Core 2 Duo 2.4GHz CPU, 3GB RAM and 500GB SATA Hard Drive.