I am looking forward to the next “The Sky at Night” episode, which I am told by Windows Media Centre will be broadcast on the 4th August 2007 at 20:30 on BBC Four
1st Broadcast: Saturday 4th August 2007 at 20:30 on BBC4
2nd Broadcast: Monday 6th August 2007 at 01:10 on BBC1
3rd Broadcast: Saturday 11th August 2007 at 12:00 on BBC2
The sun never rises for astronomers using Robonet. Patrick Moore investigates Robonet, the robotic network of telescopes which spans the globe and links the cosmos directly to a laptop. In their world of permanent darkness these telescopes can react immediately to bangs in the night’ – the exotic cosmic phenomena such as gamma ray bursts which are over in the blink of an astronomical eye.
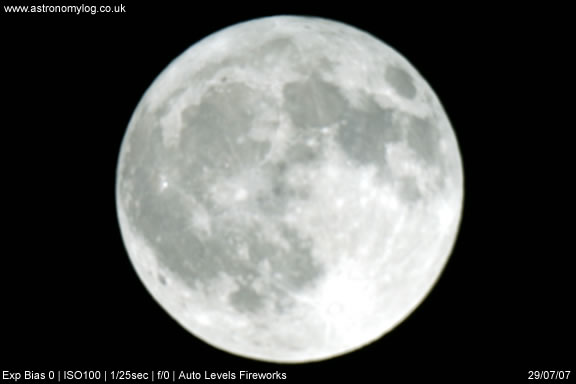
What a bright night sky, due to the full moon, which was incredibly bright tonight. The brightness of the moon literally blinded me when looking through either the viewfinder or an eyepiece. The brightness also knocked out a lot of the night sky and a number of stars became invisible.
This brought it’s own new challenges when trying to complete some photography, the webcam needed to be set to a low brightness and the digital camera required lots of experimentation to get some pictures of the moon.
Most of the pictures were taken at ISO100 at 1/25 second exposures. I then brightened them with the auto levels in Fireworks.
I also finally managed to located the Andromeda Galaxy, which through my telescope looked like a small hazy disc, but I was pleased to located it at last.
I also manually found the Ring Nebula again, it did look quite small, too small infact for me to get any photographic evidence, as I just could not get focus on either the ring nebula or the andromeda galaxy. I may try again at a later date or when I have a bigger telescope.
I stayed out until 1.30am, and at that time the temperature was about 8 degrees, and it felt cold for summer! Anyway at that time I checked Starry Night Pro and discovered that Mars was now starting to appear on the horizon. Amazing my first view of Mars, it was definitely orange coloured if not a little small in my telescope. Hopefully we will be seeing a lot more of Mars in the coming months, at an earlier time of the day, enabling me to get some photographs.
For a long time Philips web cams have been the defacto standard of web cams to use for CCD imaging of astronomy objects. Many people own or have used a Philips ToUcam web cam, the latest version of this is the Philips SPC900NC web cam.
I originally already owned a Logitech Quickcam Pro4000 so I decided to start to use this webcam and purchased a web cam adaptor for it, luckily this webcam adaptor also fits the SPC900. The Adaptor I purchased was a AC414n nose-piece. I also purchased an IR filter.
After reading a lot of information about the Philips web cam and because it was only around £45, I decided to purchase one, and try it out.
I was very happy with the Quickcam Pro4000 images of the moon, but curiosity got to me, how much better could the Philips SPC900 really be? The Logitech Quickcam was not so good when used with a barlow or an imageMate when trying to look at far off planets, so I was hoping that the Philips web cam would be a lot better.
There are modifications you can make to the webcams, but I have not modded either of them.
Philips SPC9000NC
The Philips was used together with its bundled VLounge software, and this software did introduce me to a lot of available settings such as gamma, saturation, brightness, shutter speed, contrast etc which just were not available with the Quickcam.
The Philips does seem to be a pain when it comes to starting up sometimes on the laptop, sometimes I find myself pulling out the USB cable and re-inserting it or closing down VLounge and re-starting it.
I also find that the Frames Per Second (fps) setting in VLounge seems to change on it’s own, back to 5fps, but I usually try to image at a higher fps.
The bundled software with the Quickcam is very similar to VLounge, but there are less settings to tweak with this software and web cam, only
I never have any problems in plugging in the Quickcam into the laptop, I just plug it in insert it into the eyepiece setion of the telescope and away I go, completely trouble free.
The two videos below have each been taken with the Philips and the Quickcam, to try and demonstrate the differences with the web cams. Both videos were taken within about 10minutes of each other, on basic web cam settings.
I shall try and add extra videos and stacked images from both web cams of other items in the solar system at a later date.
Philips Moon Video
This video shows a dark patch on the right, which is a house roof coming into view as the moon dipped beneath it, but the overall video is a lot darker, but I think the resolution is a lot better.
Quickcam Moon Video
I think you can see from this video that the moon was quite low, hence the astmospheric ripples, like the moon is underwater. But I was happy with the focus, detail and the brightness of the video from the Quickcam.
Overall
I think the Philips SPC900 is definitely the better webcam when it comes to functionality, there are more settings to play with and you can get better resolution and record what appears to be a darker output of the sky with it.
If you already have a Logitech Quickcam Pro 3000, 4000 or 5000 then use it and have a go. If you don’t have a webcam at all then buy the Philips SPC900, I purchased mine in the UK from Pixmania (whose stock comes from France) or they are available at time of writing from Amazon.
I could not believe it another clear night. I decided to out a bit earlier tonight whilst it was still light and set up. The moon was out and a nice site in my garden. I decided to try and take some video of the moon using my Philips SPC900 to try and compare the output with the Logitech Quickcam Pro4000. It was also a good time to try out my Canon SLR on the moon.
The only problem going out so early with the laptop in tow was that lots of mosquitos were attracted by the light and the taste of me! So I darted back inside to cover myself in insect repellant, which seemed to not do too much, it wasn’t until the laptop was turned off and it got darker that they seemed to leave me alone.
The video of the moons surface using the SPC900 was not great as the VLounge software kept setting itself to 15fps, which I don’t think is high enough, as the video did seem to judder occasionaly, unless the 15fps was too high and the laptop could not handle the recording, but I am sure I set the Quickcam to video at a faster frames per second than 15 and that was ok. So I only have stills to show you.
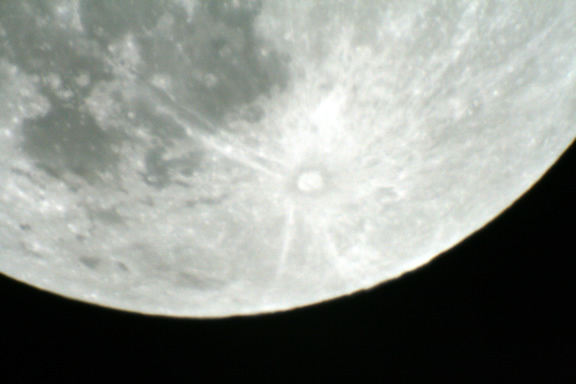
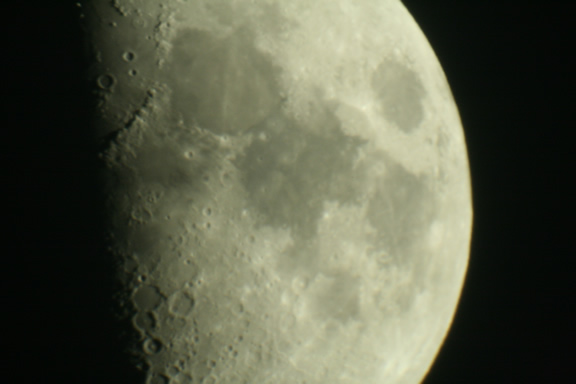
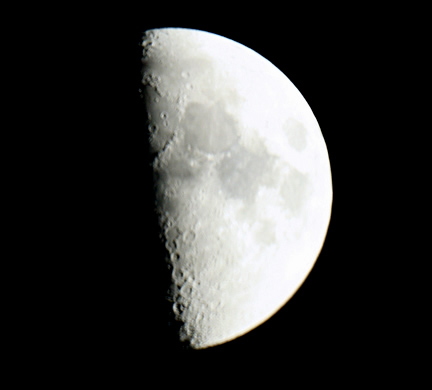
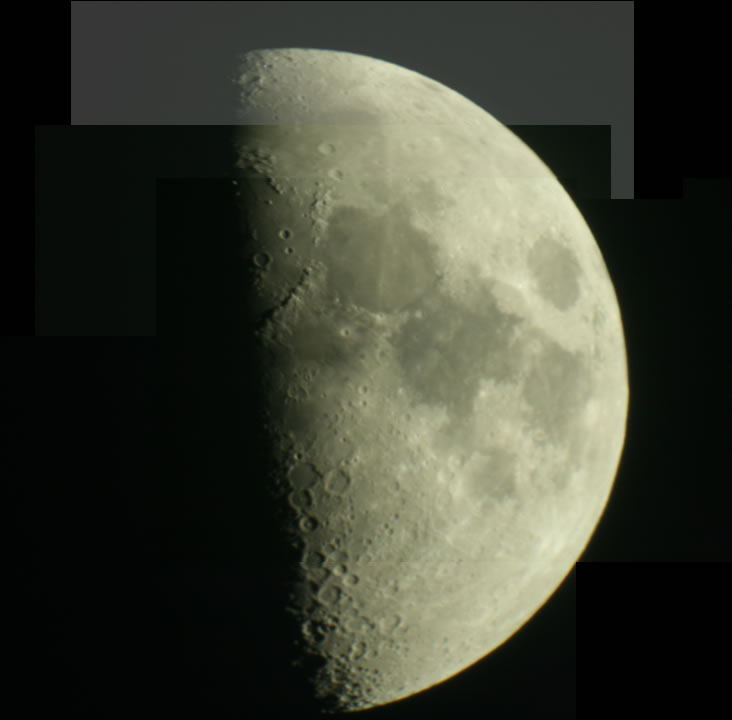
Anyway, below are some shots of the moon I managed to get with the DSLR.
There was a lot of trial and error with taking the photos, most of the time I used a 2x barlow on the end of the camera adaptor or put an eyepiece inside the camera adaptor. Where the moon is shown whole – these were taken with no magnification at all (prime focus) just with the camera attached to the telescope.
I have also made up a collage of shots below, to make one large shot, click on the image below to see the full shot.
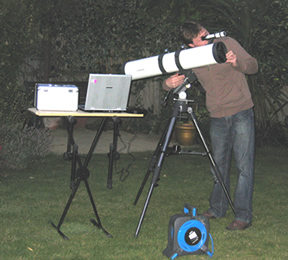
My wife also sneaked out and took a photo of me and my set up.
Astronomy for the utterly confused (ISBN 0071471588) reminds me of the dummies guide series, as the front cover is black and yellow, plus the content is similar to what you would expect in a dummies guide.
The content of Astronomy for the utterly confused is very good and gives a very good overall coverage of the basics of astronomy.
The book only contains black and white content though, including images, which is a bit of a shame as sometimes the book calls you to notice the difference in colours in images, which you just can’t see, but I suppose this does keep the cost of the book down.
At the end of every chapter is a section of questions about the chapter you have just read, luckily the answers are also included.
Astronomy for the utterly confused contains 18 chapters, which covers a wide range of astronomy topics including key concepts and basic laws, solar nebula, planets, the suns role in our solar system, astrophysics basics, stars and galaxies, dark matter and the future of the universe.
There are some nice chapters on the early astronomers in history such as Johannes Kepler who discovered the orbit of Mars was an ellipse and not a circle, as well as Galileo Galilei who was the first scientist to use mathematics and perform experiments in a manner similar to modern scientists.
There are also some nice sections in Astronomy for the utterly confused on satellites and meteors.
Overall Astronomy for the utterly confused is a good introductory book on the general topic of astronomy, this is a great book to read for a general introduction, its just a shame the pictures are not in colour.Astronomy for the utterly confused would be really good for student projects or for a good overall read on astronomy for beginners.
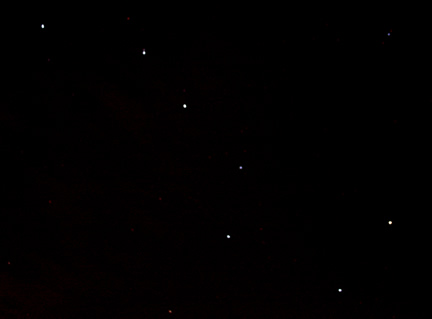
The second clear night in a row – was this possible? Tonight (19th July 2007) I decided not to take out the telescope but just take out my new Canon 400D and my remote control and tripod.
I had ideas of trying out the Bulb setting which everyone talks about and trying out some photography from a static tripod using the remote control that I purchase from eBay – actually the tripod was from eBay as well!
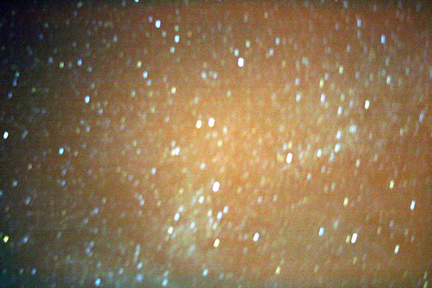
Anyway, I put my camera onto manual and then the bulb setting and this time remembered to put the lens onto MF – (manual focus). I then directed my camera at the heavens and took some photos at varying exposure times.
I kept darting back into the house to view the photos on my laptop under red light provided by my red torch to see how well I was doing.
The problem I had looking back was that I did not keep an exact record of what exposure times I was using etc. I must remember to takes notes next time on the settings used and exposures used etc.
Anyway below are the best three photographs I managed to make. I did play with the photos a little in Fireworks, but it appears that most people use PhotoShop instead, so I need to really look at using this, especially because it has a lot of extra plugins available, including astronomy plugins.
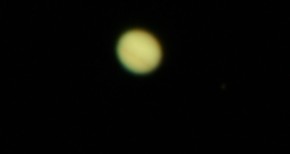
At last after what seems forever there was a clear night on the 18th July. The only problem was that because it had been raining earlier in the day the dew level was amazing.
The telescope was absolutely soaking, and I was more worried for my laptop and new Canon 400D – but I had to make the most of the clear skies.
I played about with the Canon 400D and tried out my new T ring and adaptor, I started looking at Jupiter and inserted a 9mm K9 into the camera adaptor but the focus was not great, so I went back down to 15mm Plossl and took some photos, the best of which is below:
I still have a problem with getting blurry images, because my mount and telescope is not motor driven.
Then I tried to take some pictures of the heavens with the Bulb setting on my Canon camera on my other tripod, but everytime I tried to open the shutter for a set amount of time, but the camera just made a backward and forward noise and that was it, so I went into the garage and turned the light on and the Bulb function began working, I could not figure this out, so I asked a question on CloudyNights and I have found out that when outside in the dark I need to change the lens on the camera to MF – Manual Focus instead of AF Auto Focus – which I had it on – never mind, you live and learn!
Finally I retreated off of the wet grass and onto the patio and went hunting for my first site of the Ring Nebulae. Well after star hopping and with help from Starry Night Pro, I managed to actually find it, I have no photo to show you, but I was amazed to have found it! It did not look as good as you sometimes see it in books, as my poor old 5″ 130N was not really up to the job, perhaps I need an LX90 and fast!
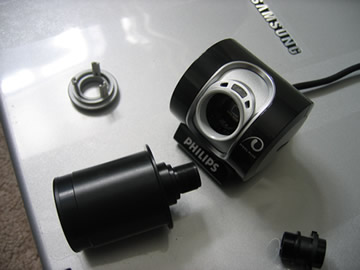
Adding the Adaptor to the Quickcam Pro 4000 meant you had to unscrew the webcam and take it apart first, but luckily the Philips SPC900 webcam is really easy to take apart and add your eyepiece adaptor to.
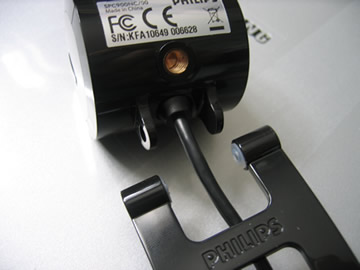
Remove monitor clip
The large plastic clip on the webcam can be removed, there is no screw or anything you can really break here, just pry and pull the long plastic clip away from the webcam.
Below is a picture of the clip after it has been removed.
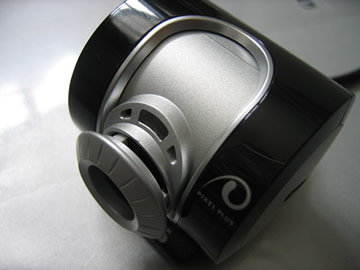
Remove outer lens cover
First of all you will need to pry off the outer lens cover of the SPC900, I did this myself with a small jewellery type screwdriver – the smallest I could find. You may be able to see from the photos that I did manage to slightly scratch/indent the plastic where I inserted the screwdriver.
After you get the screwdriver in, just gently pull out the lens cover, which once out completely, looks like the image below.
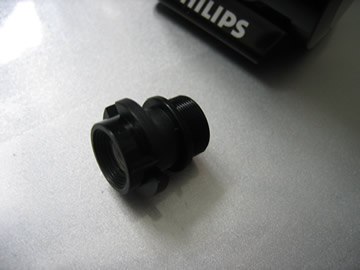
Unscrew the main lens
Now just unscrew the main lens cover until you can take it out.
Remember – do not leave the sensor open to the air for too long as dust could get in. So have your eyepiece adaptor ready.
The image above shows the webcam with no outer lens or main lens, and it’s now ready to have the adaptor added.
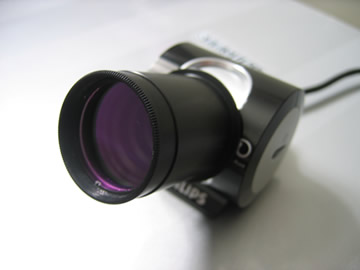
Now just screw in your eyepiece adaptor, the one I have fits really well. When you purchase your webcam eyepiece adaptor make sure you purchase the adaptor which is made for the SPC900 luckily this also fits the Logitech Quickcam Pro 4000 and 5000.
Once you have finished you will have your eyepiece adaptor ready for use. Mine is pictured with an extra screw-in clear lens to keep the dust away from the webcam CCD sensor.
Cover white light on webcam
The Philips SPC900 webcam has a white light which comes on when the webcam is in use which is very bright and annoying when out in the dark. Some people have used a black felt tip and coloured it in, instead in the photo below I have just added some blu tak and placed it over the light area, just in case I ever want to use the webcam as a normal webcam or even sell the webcam at a later date.
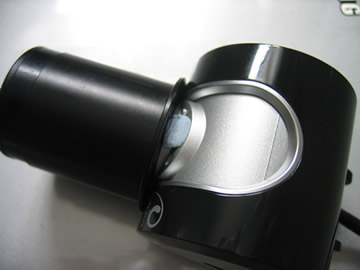
SPC900 Webcam has common screw mount
A nice thing about the Philips SPC900 webcam is that it has a screw-in mount socket, so you could always screw the webcam into a mini tripod or even a regular large tripod if you so desire.
Where to purchase the Philips SPC900 in the UK
I purchased my Philips SPC900 from Amazon, but Pixmania also sell the webcam. In 2007 mine cost £46 delivered through Amazon.co.uk. Other companies did stock the webcam but it did cost a lot more from them.
Overall Initial Impressions
After using the webcam once – compared to the Logitech Quickcam Pro 4000, the Philips SPC900 does seem to be a lot better for Astronomy use, even though both have CCD sensors.
The VLounge software that comes with the SPC900 webcam gives you a lot more control of the webcam – such as being able to change the brightness, contrast, gamma, shutter speed, frames per second and much more. You will need to play with these settings to get the best out of the SPC900.
Star Ware (ISBN 0471750638) is now in its fourth edition, this is maybe because star ware instructs amateur astronomers on how to choose telescopes and accessories and how to use them, and the technology behind telescopes and accessories is always changing with new versions of telescopes and lenses being released all the time.
Star Ware is a very useful book and one that I enjoyed reading as it covers the technology products that we as amateur astronomers look at buying everyday. The author is American so all prices are in dollars, and some versions of telescopes and accessories may not be available in the UK, so this is something to remember when reading the book.
I would say that about half of the book is given over to discussing the various pros and cons of telescope types, models and mounts. Although the beginning of the book is given over to discussing how the various types of telescopes work and a little bit of history behind them all.
Star Ware makes you think about what type of telescope you want to buy, by asking what you want to see with the telescope and how much you have to spend etc. All the major makes and models of telescope are included, such as those from Meade, Celestron, Orion, Astro-Physics and many more. All the various types of telescope are also covered including Reflectors, Refractors, Catadioptric telescopes and the various mounts used with each.
Star Ware contains an extensive chapter on eyepieces. This chapter teaches you the basics of how the various types of eyepieces work and then it reviews the various manufacturers of eyepieces, and eyepiece accessories such as barlow lenses, binocular viewers and focal reducers.
There is also a hefty chapter on astronomy accessories you may want to purchase including finder scopes, filters, star diagonals, eyepiece cases, books, periodicals, computer software and digital setting circles. There is also a great section on what you may want to look out for if you want to perform some astrophotography, including information on cameras, webcams, CCD cameras and photographic lenses.
Star Ware even includes information on observing chairs and observatories. There is even a really nice chapter on DIY astronomy, which tells you how to make your own swinging table, various observing chairs – the LYBAR chair and Ron Boes chair, a lazy laser collimator, a simple dew heater, vibration suppression pads, a simple accessory tray, an equatorial table, and even a skywatcher observatory shelter. So there are loads of DIY projects for you in this book if you fancy giving them a go.
Star Ware also has a useful chapter on how to set up your telescope and various mounts after you have unpacked your new telescope, as the author Philip Harrington knows how a lot of telescopes arrive with useless instruction manuals. This chapter also covers how to clean your telescope and mirrors, also how to collimate your Newtonian telescope or Schmidt Cassegrain telescope.
The final chapter entitled ‘Tricks of the Trade’ shows you how to evaluate sky conditions and how to traverse the nights sky, by star hopping or by using setting circles and how to polar align your telescope.
Overall the nice thing about Star Ware was that it just covered the hardware of astronomy and did not talk too much about the planets and the universe. But also the book was not just about telescope hardware and accessories but it did also tell you about how the various pieces work and the author provides his thoughts on various makes and pieces of equipment.
It was also nice to see some tips on how to set up telescopes, polar align, star hop and have lots of tips on various subjects including traveling with your telescope, storing your telescope and maintaining your telescope.
Star Ware was a book I thoroughly enjoyed reading and a book I would pickup again for reference in the future. Star Ware did not contain a great deal of images but just the right amount, the only drawback for UK readers was that prices and hardware models were all based on the US.
Just a quick post to tell you all my Philips Webcam SPC900NC arrived today. It appears that all Pixmania products are shipped from France. Anyway I have managed to take the webccam apart and screw in the webcam adaptor, now I just need a cloud free night to give it a go and compare it against the Logitech Quickcam Pro 4000.
I shall also add a post on how I took apart the SPC900NC/00 and screwed in the adaptor, also about how the installation went on my laptop and where to get the latest drivers etc


 Astronomy for the utterly confused (ISBN 0071471588) reminds me of the dummies guide series, as the front cover is black and yellow, plus the content is similar to what you would expect in a dummies guide.
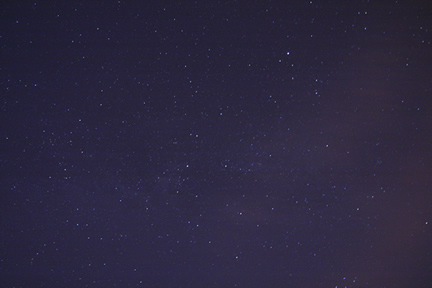


 Star Ware (ISBN 0471750638) is now in its fourth edition, this is maybe because star ware instructs amateur astronomers on how to choose telescopes and accessories and how to use them, and the technology behind telescopes and accessories is always changing with new versions of telescopes and lenses being released all the time.