Archive for June, 2007

If you want to get into using a webcam for astronomy, then most people recommend the Philips SPC9000NC webcam, but luckily I already owned a webcam which I use for Skype, from Logitech called a Quickcam Pro 4000.

I knew that webcam adaptors existed so that you can insert the end of the webcam straight into the telescope eye piece area and then use a laptop to record your footage. What I needed to know was if the Quickcam Pro 4000 could be used with one of the stanard telescope webcam adaptors.

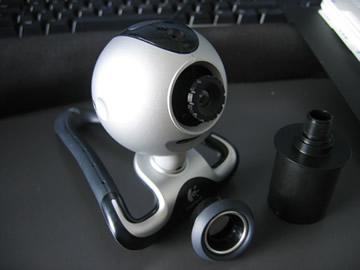
I decided to try and take the Quickcam Pro 4000 apart, this can be easily done by inserting a screwdriver into only one of the holes on the webcam and unscrewing the screw in the webcam.

Now prise apart the webcam and then you should be able to take the webcams main front ring off and then unscrew the lens out of the webcam.

This image below shows the webcam after I have opened it by unscrewing it and then taking off the rubber surround, I have then just screwed the webcams lens back in.

Quickcam Pro 4000 with lens

Now you can unscrew the lens from the webcam, which will leave the CCD sensor open to the air. It is advisable to not let a lot of dust get into the webcam, so do not leave the CCD chip in the webcam open to the air for too long.

Quickcam Pro 4000 Webcam without lens

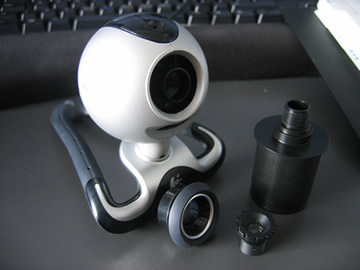
I then purchased a webcam adaptor for £20, luckily the webcam adaptor I required for the Quickcam Pro 4000 was the same webcam adapter which is used for the new Philips SPNC9000 webcam.

Logitech Quickcam Pro4000 with Telescope Adaptor Fitted

You can also purchase ends for the adaptor or filters that screw into the end of the webcam adaptor in order to protect the CCD sensor from dust.

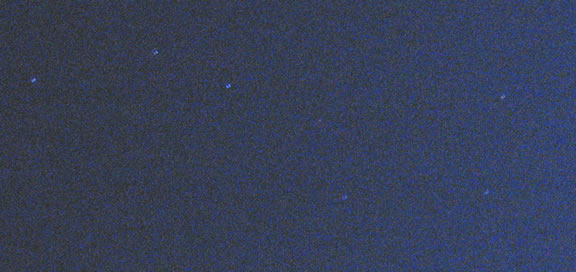
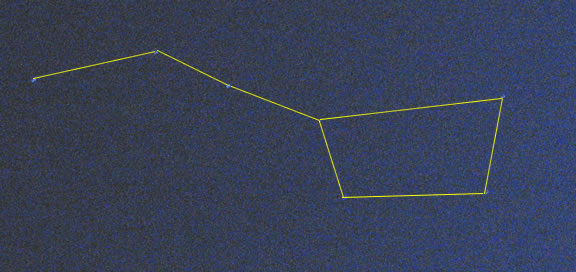
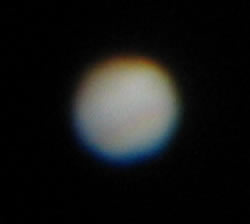
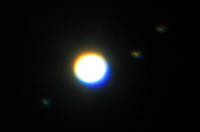
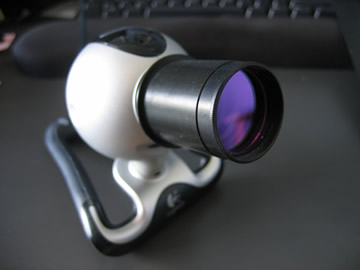
Now you are ready to try your webcam in your telescope and get some photos and video.

All you need to do is insert the adaptor end into the telescope eyepiece area, and use some video capture software to get some great images.

On a clear night over my head in my garden I can clearly make out one of the major and probably most well known constellations, Ursa Major, one section of this is The Big Dipper or in the UK it’s also called The Plough.

Seven of the brightest stars, which are located in Ursa Major or the The Great Bear’s hindquarters and tail, form the big dipper.

I took the following photo last night using just my simple Canon IXUS500 camera with a setting of landscape/infinity focus together with a high ISO and a tungsten effect. I then had to import the image into Macromedia Fireworks in order to alter the brightness and contrast settings in order to get any sort of image out.

Big Dipper, The Plough

The image is not brilliant but if in the following image I overlay a line between the stars you can more clearly see the big dipper, or click on the image to see the full size.

Line Drawing Overlay of Big Dipper

I am looking forward to perhaps purchasing a decent SLR camera and trying that on the nights sky, perhaps a Canon EOS 350D, we will have to see.

After looking up Ursa Major I was amazed to find that M97, M108 and M109 are very close by, so next time I am out I shall have to remember to look out for them and report back.

Astrophysicists have found a star-like object with a surface temperature just one tenth that of the Sun.

The cold object is known as a brown dwarf: a “failed” star that never achieved the mass required to begin nuclear fusion reactions in its core.

Artist's impression of a brown dwarf (Nasa)

This one - called J0034-00 - is thought to have a surface temperature of just 600-700 Kelvin (up to 430C/800F).

It is the coldest solitary brown dwarf ever seen, according to the British team that discovered it.

This find further tests the boundary between high-mass gas planets, like Jupiter, and the smallest brown dwarfs.

‘Needle in a haystack’

“Physically, stars, brown dwarfs and the gas planets are all the same thing - they’re just blobs of gas with different mass,” said Dr Steve Warren, of Imperial College London, who led the project.

“And as this work progresses, we’re going to start finding things between the stars which have the masses of planets, and what are we going to call them?”

The brown dwarf was first spotted by his colleague Dr Daniel Mortlock.

“Identifying an object like J0034-00 is a more challenging version of finding a needle in a haystack,” he said.

“In this case it was like looking for a piece of slightly reddish straw rather than a nice shiny needle.”

J0034-00

J0034-00 is the greenish object near the bottom

J0034-00, found in the constellation of Cetus, is a relative lightweight.

It has a mass of just 15-30 times that of Jupiter and a similar diameter.

It was spotted in the early stages of the world’s deepest ever near-infrared sky survey - using the UKIRT telescope in Hawaii.

Using four filters, the telescope produces 2,000 images a night - a vast amount of material to sift through.

The reason for the filters is to get an idea of the colour of objects in the sky.

‘Billion times nearer’

Dr Mortlock had been looking for distant quasars when he found the brown dwarf.

“One of the interesting objects that turned up there didn’t have quite the right colours for a quasar, and that was J0034-00,” he said.

“The peculiar thing was it was a billion times nearer than the quasars we were actually looking for, and it looks almost identical in terms of the colours,” added Dr Warren.

More observations, made at the Gemini South Telescope in Chile, were needed to work out its temperature and likely mass.

It is still too early to say exactly how far away it is from Earth, but the research team believes it could be about 50 light-years.

And that is not so far, compared with the distance from some of the stars that can be seen with the naked eye.

Due to the number of houses around my small garden it has been hard to find some of the planets which only rise a little over the horizon, as a lot of the time I just cannot see them. But on Friday 1st June I actually managed to get my first sighting of Jupiter.

Using my K9 lens I could just make out the markings and bandings across the planet, I also tried then using my 2x barlow lens with it, but I could not make out much more detail. I think my next pruchase will have to be a good quality barlow lens and a 4x or 5x lens to try and improve my night viewings.

Jupiter

Anyway, I was also amazed to make out three stars in a horizontal line around Jupiter, after looking this up in the Collins Skywatching Book (ISBN 0002200287) they are in fact the Galilean Moons of Jupiter, of which there are actually four moons, but sometimes you cannot make out all four moons as one may be in front of Jupiter.

Jupiters Moons

Having failed to get any decent pictures of Saturn so far, I decided to try and take video of it instead. I ended up using my Nokia 6320 phone to take the video, which is not the best gadget to use for video admittedly, plus I was indoors, again not a good idea as I think some of the focus may have been on the actual window.

I then decided to add it to YouTube, I already have a YouTube account, so I uploaded my first video. The video files comes off of my Nokia in 3gpp files, I used Apples QuickTime Pro 7 in order to cut he video and re-save it as a .mov file, which was then uploaded to YouTube.

It’s only after I uploaded my not so great video that I saw a whole host of really good images and videos on YouTube by other astronomers, and I hope to put some of my favourite astronomy videos from YouTube on the blog soon.

Anyway here are my first efforts. If you look hard enough you can just make out Saturns rings.