Attaching RA Motor Drive to MON1 Mount
After owning my Bresser Messier 130N for around two months I decided to invest in an RA Motor Drive for it. This particular RA Drive fits just the 130N and R90 telescope models. Other models of telescope in the Messier range can use another drive system which operates both the RA and Dec Axis.
I decided to buy one as I thought that the Messier RA Drive would make my job of keeping an object centered a lot easier, whether this worked or not can be discussed in another post when I actually review the RA drive, but this post will take you through how to attach your RA Drive to your MON1 telescope mount (as you can tell from the images I did this in the garden on a nice hot summer day).
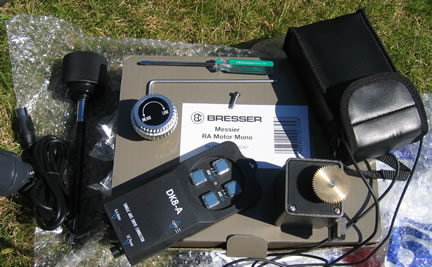
Unpacking your RA Motor Drive
You should find the following contents in your box, the nice manufacturers even supply an Allen key and screwdriver!
Below you can see the hand controller, battery pack, motor, screwdriver and RA knob etc.
Attach the Motor
The first thing you need to do is attach the motor part to your MON1 mount.
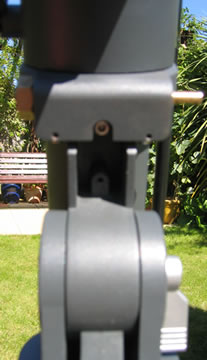
You need to first tilt up your telescope mount to reveal a screw hold underneath as shown above, this is where your Allen key screw will go.

Now locate the motor and the Allen key and the screw, and get ready to attach the motor.
The image above shows the motor attached by the single screw.
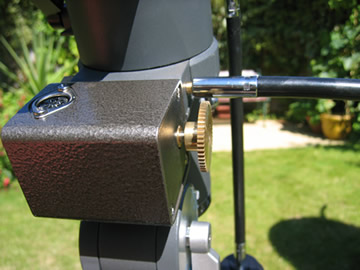
Remove RA Arm
Now remove your RA ‘wobbly’ movement arm, just unscrew the screw on this and remove it, so you are left with your mount looking like the image below:
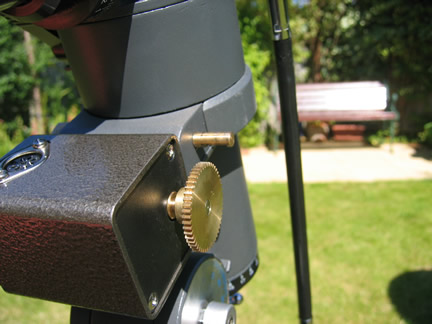
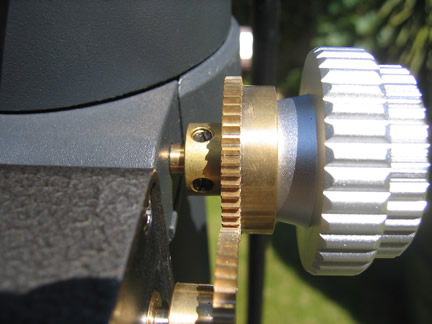
Screw on RA Knob
Now screw onto this the new RA adjustment knob. There are two screws to this so make sure you align it up properly and screw both of them quite tightly using the provided screwdriver. The most important part to this is to make sure you get the teeth of both cogs nicely touching, not so tight so they don’t move but so they can turn each other.
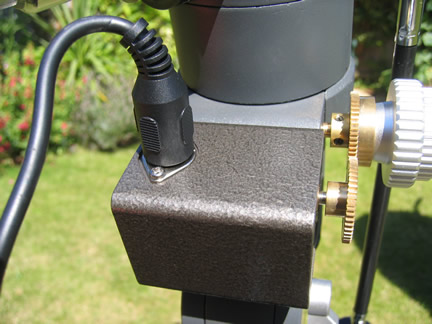
Attach Hand Controller
Now attach the hand controller DIN plug to the motor drive, as shown below:
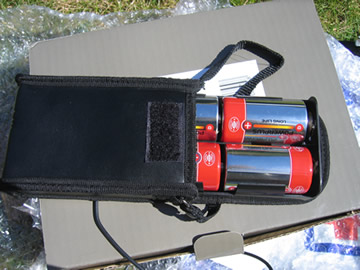
RA Motor Drive Batteries
Finally you will need 4 x D Batteries to get the RA Drive to work, I purchased mine from Wilkinsons, and only paid about £1.20 for 4, the instruction booklet says you can use an AC adaptor but I would not recommend it.
Now plug the mains lead into the hand controller and you are ready to go!
RA Motor Drive Hints and Tips
I would advise removing two of the batteries when you are not using the RA drive, as the batteries could still use a little power.
Always remember to ‘Unlock’ the RA handle when you want to manually move the telescope on its RA axis or you could damage the motor drive. It’s also important to check that the same RA handle is completely ‘Locked’ when you want to use the RA Motor Drive as sometimes it can come loose and the telescope can stop moving.
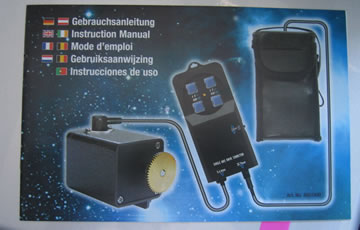
RA Motor Drive Instruction Manual
There is a very good instruction manual included in the box, which is shown below and it should tell you everything you need to know.
I have the same scope, I am wondering if it possible to mount the same motor drive to the dec? what I saw from your pictures, this must be possible, or am I wrong? I am asking because I wanna upgrade mine with a homebrew goto.
I suppose it would be possible, but there will probably be no place to screw in the Dec motor to the mount plus it may be hard to align the gears together.
I can’t say much more as I don’t have the telescope anymore.
ok thanks,
actually I got a good offer for the RA motor, so I will check it out when it arrives.