Sky Camera Footage from 30th May 2020

https://www.facebook.com/astronomylog/videos/594504031185351/


This is some Sky Camera footage from Saturday 30th May 2020 the night of the first manned Space X launch. I didn’t catch the ISS or rocket as the sky was too bright for my night settings. The bright object in the video is the moon.

This is the start again of my sky camera project or as I like to call it ‘SkyPi’. It’s a Raspberry Pi with a Pi No-IR v2 camera and a 180 degree mobile phone type stick on lens.

These are 9.9 second exposures, white balance is ‘greyworld’ and the exposure is set to auto with ISO 800. The still images are then put together (not in Pi) but in Windows 10 using a free program called “Time Lapse Creator”.

It was originally uploaded to my Facebook page, you can follow AstronomyLog on Facebook.

Imaging the Messier Objects Remotely from Your Laptop Book Review

Imaging the Messier Objects remotely from a laptopThis is not a book teaching you how to remotely connect your observatory to your home laptop or PC so you can control your telescope from the warmth of your lounge. I don’t think that topic would fill a book anyway. Instead this book is about renting telescopes around the world for imaging and controlling them from your laptop. Doesn’t have to be your laptop though it could probably be a desktop PC, Apple Mac, tablet or even smart phone.

I am amazed that more people don’t just rent a telescope for a couple of hours which is in a country with cloudless skies. You can probably rent a better telescope and imaging rig than you could ever afford, and you don’t have to maintain it or provide an observatory or garden shed to contain it. Or I wonder if people consider selling all their astronomy equipment and renting time on a remote scope instead or we just love looking at our scopes and we love the hands-on feel.

Anyway, the book, this is a chunky 520 pages book from Springer. Most of the book is filled with individual details on how to image each of the 110 Messier objects using remotely controlled telescopes. The author has used several different scopes and tells you which he used to image a certain M object. With each Messier object you get a constellation chart pinpointing the object, sometimes you get a negative image, but there is always the resulting image that was taken. You also get information like RA and Dec, Field of View, exposure time used, date taken, universal time, moon phase, scale of image and detailed information on what telescope was used this includes the mount used, aperture of scope, the CCD make and model, colour or mono, pixel size and the overall location of the telescope.

Before you get into the main body of the book with the list of Messier objects, the first 50 pages are all about remote telescopes. This section discusses the advantages of renting time and the different telescope sites as well as the individual telescopes and camera equipment (e.g. FOV etc) that were used at each site to take the images shown in the book. There is also information on using RA and Dec and how to use this information for inputting what you want to image on the remote site’s web site.

To be honest this book is more useful than you think, it’s not just for remotely controlled telescopes. This is good for home setups as well. Now you can look at the Messier object you want to image at home and see what the author imaged and what equipment was used and his results. If you have similar equipment at home, you can see what results you should also expect. Alternatively, if the author used a larger telescope on an object and you have a relatively small telescope then you can find out that object is not really going to image well for you.

Chapter 6 holds a quick reference image library for a list of NGC objects which is also great for reference when imaging. Most of the astronomical images are black and white. Images of telescopes are in colour and so are the constellation charts. Don’t forget that the remote telescopes will probably only take the images, it will then still be up to you to process the images and make them look good.

Overall

Some others may just see this book as 50 pages of information about renting telescope time with a big chunk of the book just listing 110 of the Messier objects and details about each image in turn. Overall though I really like this book as I think I would find it useful for my own imaging at home by using the Messier section for reference. I also welcome the first 50 pages of information on remote telescope sites as it could be the way forward for astronomers who don’t want to spend vast amounts of money on equipment or they may not have the space to store it or maintain it. Especially if you don’t have an observatory and you must drag all your equipment out every night and set it up every time you want to use it, that can become tedious – I know first-hand. Another reason I think for using a remote telescope is that astrophotography has become very popular since 2010 and most objects in the sky have been imaged so many times (just Google some!). So, you need to think about imaging with bigger telescopes or in a different way with new colour palettes for example, remote telescopes let you do this with minimal cost.

Where can I buy Imaging the Messier Objects Remotely from Your Laptop?

You can buy Imaging the Messier Objects Remotely from Your Laptop from Amazon UK

EQ8 FTDI EQDIR USB Cable Upgrade

After changing from RS232-to-Serial cables that connect my Lakeside focusers to my PC, I decided it was time to upgrade the EQ8 Dir cable as well. That was an older one from HiTec Astro and ran using the Prolific drivers.

HiTec Astro EQ8 EQMOD Cable

This time I decided to purchase the 5m EQ8 cable from First Light Optics. I went for the Lynx Astro FTDI EQDIR USB Adapter for Sky-Watcher Mounts. The 5m was ideal as it provided me with a nice lot of cable from the mount head down the pillar along the floor to the PC.

Lynx Astro FTDI EQ8 Cable 5m

I plugged it in to my Windows 10 PC and there were no drivers to install, I checked which COM port it was on and chose that COM port in the EQMod tool program and it found the mount straightaway.

Well worth the £30 I spent on the cable. I recommend you change to the FTDI version if you are still running the Prolific version and are having problems with it.

Mercury Transit 2019 Report

The Mercury transit 2019 for the UK was on Monday 11th November with it hitting the middle of the Sun at about 3pm UK time. Start time was around 12.30. Not the best time to have a transit in the winter when the Sun is so low down all day and it sets really early at about 4pm.

The weather was not kind either a 20mph wind with heavy rain in the morning and lots of cloud. But at one point there was a clear section for about 10 minutes. I did not bother opening up the observatory and imaging properly with a high frame rate camera once I saw the pouring rain and cloud cover. Instead I decided to just get the Coronado PST out on a simple tripod and have a look.

It’s so funny when you first start looking for Mercury on the face of the Sun, you expect it to be bigger than it is. Here I am looking for a big black dot, when in reality it’s a tiny black dot, which seems only a few pixels across.

I tuned out the H-alpha part of the spectrum on the PST in order to get a better contrast and a plain orange Sun. I then tried my Moto G6 phone against the eyepiece (the PST has a really narrow FOV) the phone really over saturated the image, so I grabbed my Canon DSLR with the kit lens and put that up against a 20mm eyepiece in the PST and imaged by hand. Again auto mode on the camera over exposed the images, so I changed to a faster shutter speed.

I took them into my favourite image editor and tweaked them a little to try and bring out the little black dot (Mercury) some more, and here they are:

Mercury Transit

Mercury Transit 2019 no1 with arrow

Mercury Transit

Mercury Transit 2019

They are not that great, but I best I could do without a tracking mount and a proper camera attached. I was happy to have something.

Observatory Roof Leaks and Felting

Over the years I have had to fill in and patch the odd part of the pent shed felt roof where leaks have appeared of I think birds beaks have penetrated the roof felt. Some times it was just filling the odd hole or replacing sections of felt. It was now time to replace the whole of the roof felt. Not bad really after about 10 years.

I had been seeing the odd leak in the roof and that was being absorbed by the black carpet. Why did I ever put carpet in the observatory, especially black you can never see anything on the floor if you drop anything. I think I wanted to make it more homely.

Anyway I removed the carpet and decided on trying to locate some good quality felt. The search began on the internet looking for felt at Screwfix (who don’t stock felt!) then onto Jewsons and Travis Perkins, local shed manufacturers, fencing companies and other hardware outlets. You can even buy roof felt on Ebay and Amazon. You just have to pay a few pounds more for delivery. Thing was I didn’t want to wait a week for delivery, I knew the weather was going to be OK for late October for two days so I needed the felt ASAP.

I ended up purchasing some felt from my local Wickes store. I bought the upgraded versions which come in 8m lengths. I paid £30 for the roll and I must admit the quality looks really good and it is quite light in weight, as some can be really heavy and that can’t be good for my roof. I also did make a trip to Screwfix to purchase some felt adhesive, which now comes in a tube as opposed to using a brush and a tin of bitumen. Although it turns out I did use some of the bitumen tin anyway as it was better than the Screwfix felt adhesive. Although that could have been because of the time of year, you really want a warm day in the Summer to do this job to let the tar heat up and bond. I don’t think a 11 degree day really works – why didn’t I do this in Summer?

I started the next wet dewy morning removing the hatch doors and then worked on removing all of the old felt. I was amazed how bad it had actually got as the felt had dried up and shrunk around the shed pin nails leaving quite big holes in the felt.

I proceeded to cut three strips for the pent shed roof. But as I have a raised section in the middle that support the traps doors on the roof I could not work out how to fold the felt or how we’d managed to do fit it over 10 years earlier. I couldn’t see any folds in the old felt I had just removed either. Never mind in the end I just made a couple of cuts and folds and had to perform the odd patch.

It turns out that the 8m roll of felt is not really enough for my 8ft shed with overlaps. So I didn’t have enough felt to cover the trap doors as well, luckily I had some other spare felt, but that was of the heavier type which did not match. So next time, buy 2 rolls!

After day 1, I was far from finished, so I made it watertight put the doors back on the roof and went in. The next day I started again and managed to nearly complete the changeover. That’s the problem with October days you only get to work until about 4pm before it gets too dark or cold. I’m glad I got it finished on the 2nd day as on the 3rd day I was expecting a good test, with heavy rain forecast. Boy did it rain, it poured down and I’m glad to say that evening upon inspection I could find no leaks inside.

Now I look forward to hoovering it out, putting the furniture back in and re-attaching all the cables back into the PC. Hopefully I won’t have to do it again for another 10 years at least. That is if by then at the age of 57 I will be able to lift the heavy doors off of the roof and put them back on, we’ll see. I suppose my son who will be a late teenager by then may be able to help me.

I now look at these lovely observatory sheds with their sliding roofs that run on rails and I think to myself why didn’t I make one of those instead? and the answer has always been the garden is too small to take the external posts and runners.

The Art of Astrophotography Book Review

the art of astrophotography bookNot another astrophotography book I hear you say, now it seems that observational astronomy it dwindling and now everyone wants to image. Why wouldn’t you though, it nice to share pretty pictures. Imaging equipment can cost a lot of money though, but there are some reasonably priced high frame rate cameras on the market now. In addition to this a lot of the image capture software is free to use.

The Art of Astrophotography by Ian Morison is a really interesting imaging book mainly because it contains real images you can expect to create on a home astronomy set up with mid-range equipment. I also like it because each section is not too large and a lot of colour images break up the text nicely.

All areas of imaging with various equipment are covered in The Art of Astrophotography. The book begins by teaching you how to image star trails with a digital camera it then moves onto digital camera imaging of constellations. Finally you get told how to image the sky with a digital camera with a tracking mount. This enables you to image for longer with round stars. All that is within the first 30 pages and the full book has over 250 pages so you can already see this book covers a lot about imaging.

Next we have imaging the moon with a smart phone or compact digital camera and then with a DSLR camera.  From there we have imaging the Pleaides with a DSLR and a small refractor telescope.  NExt there is imaging M42 with a modified DSLR camera and of course how to process the image afterwards.

After the initial section on images The Art of Astrophotography  then looks at astrophotography accessories, including telescope types and flatteners.  It then gets slightly more complicated by introducing the science of using a guide camera for imaging and about how to cool a standard DSLR camera.

The author next takes on imaging the North American and Pelican Nebula with a refractor and an DSLR as well as discussing how to cut down on light pollution in your images.

Imaging planets is covered next with either a DSLR or a high frame rate camera. Now we are using Registax for processing and looking at planetary imaging with RGB filters. Whilst still using Registax the book moves on to looking at imaging the moon with a high frame rate camera or DSLR.

Now it’s the turn of the Sun, and that is imaged in white light and Ha using either a standard refractor with filters and specific Ha telescopes.  There is also information on how to best image comets and meteors and processing them using Deep Sky Stacker.

Next the book moves onto covering the more expensive colour and mono cooled cameras and how you can benefit from their use and what to consider if you are going to buy one.

LRGB colour imaging with filters is covered next, useful if you purchase a mono cooled camera. Purchasing good quality colour filters and a USB powered filter wheel can be costly, something to remember if you decide to purchase a mono camera and want to colour image. After this naturally there is then narrow band filters, so Ha, Sulphur II and OII filters. That is the end of the main part of the book, but up next is some large appendices to look at.

Appendix

The first appendix is about telescopes for imaging and which may be the best for you to use and your budget. This can depend on the type of object you want to image. As I have found not one telescope is good at all imaging tasks. After this comes telescope mounts, which are even more important in my mind than the telescope that sits on it. The effects of the atmosphere are also covered in another appendix and then auto guiding and image calibration are also covered. Finally at the rear of the book are some really good website links.

Overall Thoughts

The author has certainly packed a lot into The Art of Astrophotography. This is a great book which covers a lot of different objects you could image with a lot of different equipment. Who is it for? Well I think it is for a beginner coming into astrophotography as it gives you a complete overview of all the different equipment and objects to image or it’s for those astronomers who have the equipment but want to know more about how to process their images and what they can actually image with their equipment.

Where can I buy The Art of Astrophotography book?

You can buy The Art of Astrophotography from Amazon UK

Astronomy of the Milky Way Book Review

The Observer’s Guide to the Southern Sky

astronomy of the milky way book
This is the second edition of Astronomy of the Milky Way by Mike Inglis. This second edition has been updated with new science that has been found out about the objects in the book. This version of the book also benefits from a larger format with re-drawn maps and an increased number of images in colour.

A lot of the objects that are in the sky in the Southern hemisphere are objects that many of us in the northern hemisphere may never have the chance to observe with our own eyes. But we are lucky enough to be able to view a number of objects that appear in both the northern hemisphere and southern hemisphere skies during the year and that’s the same for those living in the Southern hemisphere. This book covers some objects that you can’t see in either the Northern or Southern so there is something for everybody.

Astronomy of the Milky Way takes us through the highlights of the Southern hemisphere throughout the year. It starts what to see in January and February and then March and April and finally May and June. Why only half the year, well you have to read book 1 in order to get the other months, as the author admits they can’t all fit into one book.

Astronomy of the Milky Way looks at Monoceros, Canis Major and Hydra, Canis Major, Puppis, Lepus and Columba, Pyxis and Antila and Vela during January and February. March to April brings us Carina, Crux, Musca, Centaurus, Circinus, Volans, Octans, Chamaeleon and Telsecopium. May to June has us looking at Triangulum Australe, Apus, Lupus, Norma, Ara, Pavo, Libra, Scorpius, Ophiuchus and Corona Australis.

There are some great full colour images of celestial objects and some very clear constellation diagrams as well as lots of data about the objects including RA and Dec and magnitude.

Astronomy of the Milky Way is full of appendices, with 10 in total. These cover astronomical co-ordinate systems, magnitudes, stellar classifications, light filters, star clusters, double stars, star colours, books, magazine and astronomical organisations, the Greek alphabet and some popular astrophotography websites.

Overall thoughts

It’s nice to see books split up by month as they can be great for reference when you are planning your observing sessions throughout the year and you want to see what’s in the sky tonight to observe or image. Overall Astronomy of the Milky Way is a great book for those wanting to familiarise themselves with objects in the Southern hemisphere.

Where can I buy the Astronomy of the Milky Way book?

You can buy Astronomy of the Milky Way from Amazon UK or from Amazon US – https://amzn.to/2JTInRT

Unveiling Galaxies by Jean Rene Roy Book Review

The Role of images in astronomical discovery

unveiling galaxies bookUnveiling Galaxies is split into three parts. Images and the Cosmos, Images as Galaxy Discovery Engines and Organising the World of Galaxies.

This book charts the history of the understanding of galaxies through the use of images that have been taken over time. These images became investigative tools and our understanding grew with the emergence of new technology for imaging these vast galaxies. The book also explores the impact of optical, radio and X-ray imaging techniques.

The final part of organising the world of galaxies discusses the importance of galaxy atlases and how astronomers organised those images in order to educate us and how they promoted ideas and pushed forward for new knowledge. Images that caused confusion among astronomers are included to show us the reader what challenges were faced by astronomers of the time. We are told how images helped to distinguish between deep-sky objects, such as nebulae and galaxies. We may forget that in the early days astronomers sat looking at images and maps, there were no computers. This was very much ‘hands on astronomy’.

Unveiling Galaxies is a beautiful book and very interesting if you are into the history of astronomy and the role that images have played through the years and changed our way of thinking about the universe.

This hardback book contains 270 pages with an appendix, bibliography and index. There are also colour plates/pages found in the middle of the book, as otherwise all images and diagrams are in black and white.

Where can I buy the Unveiling Galaxies book?

You can buy Unveiling Galaxies from Amazon UK or from Amazon US – https://amzn.to/2Wfv9kO

The Cambridge Photographic Atlas of Galaxies Book Review

The Cambridge Photographic Atlas of Galaxies by Michael Konig and Stefan Binnewies

Cambridge photographic atlas of galaxiesI really enjoy looking at my Cambridge Atlas of the Messier objects when imaging to see what I am looking for and what my final images should look like. So I was really pleased to see there was now an atlas of the galaxies as well.

This is a hardcover full colour book and it starts with a beautiful inner cover (both front and back) of the galaxies displayed on a constellation map providing the name of the galaxy and its co-ordinates.

The contents section is very clear listing all the galaxies covered in the book. There are over 320 pages of information.
Before we begin running through all the different galaxies there is an introduction section detailing the first galaxy catalogues and the nature of galaxies.

Each section in the book is split up into galaxy type with spiral galaxies being first. The beginning of each section covers the classification of that type of galaxy and its morphology and astrophysics.

The first galaxy in the book is NGC45. Each galaxy in turn is displayed in full colour with the images taken by the acclaimed amateur astrophotographer and these images are brilliant, very professional. There is a write up about each galaxy as well as a data section which provides us with details such as the constellation, RA and Dec, Brightness, type, names of the photographers, telescope used to image it, the imaging camera name, exposure time and location where it was imaged. Some of the galaxies have information on how the astrophotographer imaged the object as well.

Most galaxies in the book have their own page, with some having two pages where one full page displays a large full colour image.
As well as spiral galaxies there is a section on barred spiral galaxies, elliptical galaxies, irregular galaxies, dwarf galaxies, ring galaxies, galaxy groups and clusters and finally active galaxies, quasars and gravitational lenses. There is a bibliography and index at the rear of the book.

There are more than 250 galaxies featured in the book from both the northern and southern hemisphere. You will find galaxies from all catalogues including Messier, Abell and Holmberg.

Overall

What makes The Cambridge Photographic Atlas of Galaxies great for me is the really fantastic full colour images and that each galaxy has information on how that image was taken. This is really useful to the Field of View that was achieved with a certain diameter telescope and what camera was used along with the exposure times. This makes the book a brilliant reference book.

Where can I buy the Cambridge Photographic Atlas of Galaxies book?

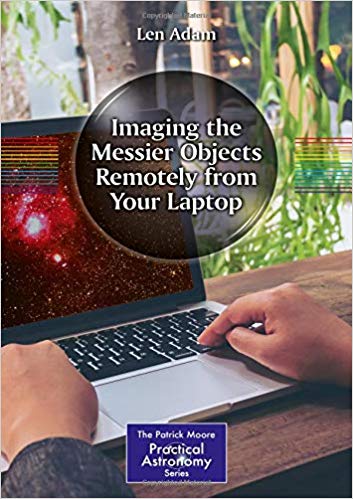
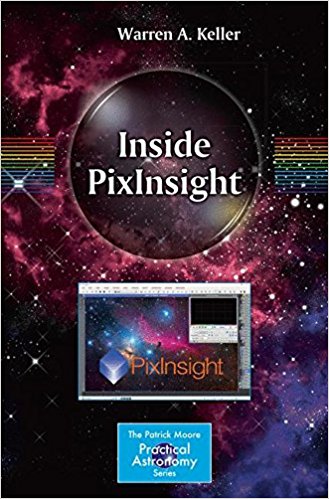
Inside PixInsight Book Review

Inside PixInsight BookThere have been numerous YouTube videos, articles and DVDs on PixInsight, but it’s good to see a thorough PixInsight book written on the subject with lots of helpful screenshots.

I have reviewed and used many astrophotography processing books on the subjects of various techniques from planetary imaging to deep sky imaging. One of notes include the excellent ‘Learn from the Masters’ and the excellent Photoshop book ‘Photoshop Astronomy’. But you do have to be careful with this type of book that you don’t start it and then never actually work through the whole book. This book and many other processing books can’t be picked up one day and left for a month and then started again. It’s repetition that will get the processing skills and workflow lodged into your brain. Plus you need to be processing images regularly otherwise like me you may find you forget all those brilliant Photoshop skills you once learnt.

I am not a user of the full version of PixInsight (which does cost around £200) but I have tried the LE version which is free. I do my processing in MaximDL and then in Photoshop for deep sky images that is. Planetary, Lunar or Solar imaging is done in AutoStakkert and Registax then maybe Photoshop.

PixInsight Book

Inside PixInsight is split into 4 parts, each part contains on average 6 chapters. There are 25 chapters in total in the book which is spread over 350+ pages. This book is jam packed there are no appendices fillers in this book!

The five parts are: Preprocessing, Linear Post Processing, Nonlinear Post Processing and Special Processing.

Pre-Processing

Pre-Processing is all about calibrating and aligning your individual image frames. This section takes you through doing this and telling PixInsight where to locate your light frames, dark frames and flat frames etc. There is information on using Master Darks in PixInsight as well as Dithering, star alignment and more. There are details on using reference images and how to perform batch pre-processing within PixInsight.

Linear Post-Processing

Linear Post-Processing is where we get into background models and dealing with uneven field illumination. There is also a chapter on using Masks and a chapter on Deconvolution. To finish off this section there is a chapter on color processing and noise reduction if you use a colour camera.

Non-linear Post Processing

In Non-linear Post Processing we look at stretching, combining our LRGB frames. We also take a look back at the various toolbars and menus and then work on nonlinear noise reduction, HDR (High Dynamic Range) compression together with working on the images contrast and sharpness. There are then a couple of chapters about finishing up such as looking at color saturation, some transformations and painting. Finally there is a chapter on archiving, saving your work in different formats and how to print.

Chapter 21 is a workflow chapter that takes you through processing an image with a mono or colour camera.

Special Processing

The Special Processing section specialises in comet techniques, HDR, drizzle, multi-scale images, narrowband processing and workflows. There is then a chapter on mosaic processing.

Overall Thoughts on Inside PixInsight

At the end of the book are some really nice deep sky images that have been processed in PixInsight.

Inside PixInsight contains a mixture of colour and black and white images. The screenshot are mainly in B&W which is fine as they really don’t matter too much. There are enough images to stop you getting lost.

From what I have read and followed through the book it seems a good book to stick at and work through if you really want to conquer PixInsight. Plus it’s nice to read a paperback as opposed to staring at a screen all the time, but more often than not I imagine you will have the book open in one hand and the other hand will be on the mouse whilst using PixInsight.

I think you need to read this book, follow online tutorials and watch some YouTube videos and practice, practice, practice in order to be become a seasoned user. I can recommend using ‘Inside Pixsight’ as one part of your arsenal.

Where can I buy the Inside PixInsight book?

You can buy Inside PixInsight from Amazon UK