Canon 450D Digital SLR Camera Review

Canon 450D Camera
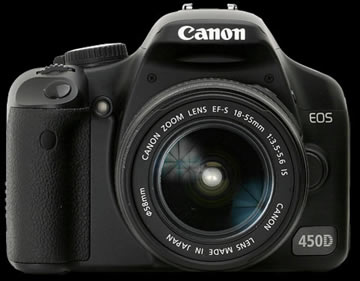
My first DSLR purchase was a Canon 400D, which I purchased in July 2007, so about 14 months ago. A great camera and the only reason I bought it was to use it for astronomy. But once I heard about the new 450D being released, I thought why not upgrade? Well I left it a while then after hearing a talk be Nik Symanchek I decided to go for it.

I ended up selling my 400D camera on Amazon and then purchased my new Canon 450D from Dixons, for £446 which luckily included a £50 cashback offer from Canon as well as free delivery at the time.

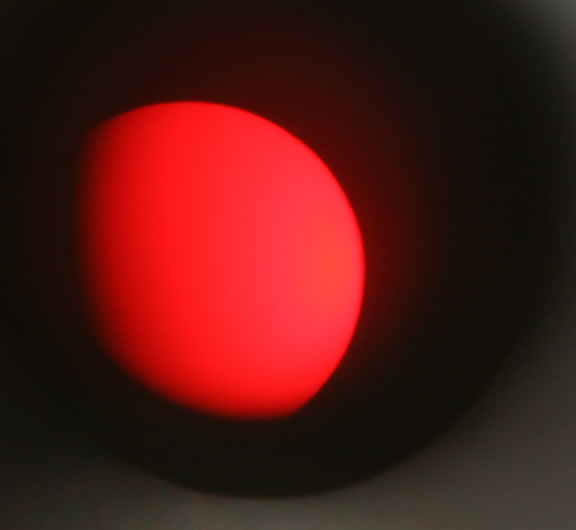
The main reason for the upgrade was the Live View mode, my main problem with doing astrophotography for me was getting the object in focus in the small cameras viewfinder. I did invest in a right angled viewfinder with 2x magnification, but even that was not that easy to use, but it did help.

Canon 400D vs Canon 450D
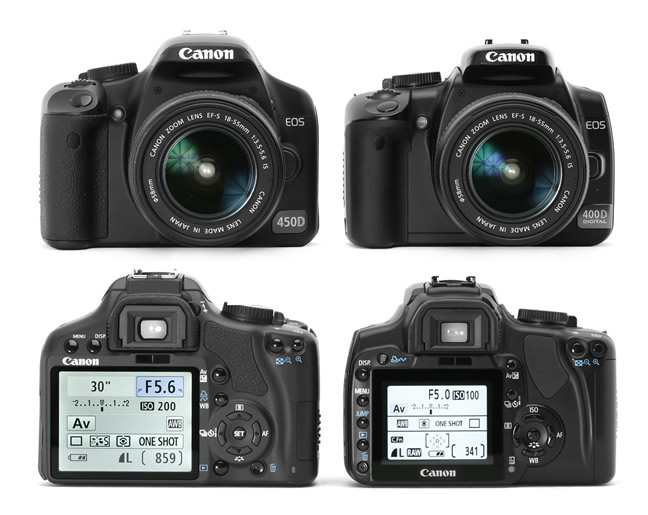
There is not a great deal of difference cosmetically between the cameras. The menus and layout of the camera are very similar. If you already have a 350d or 400d then you will find using the 450d really easy.

The new 450D is lighter than the 400D, it also has a nice feel to the grip now, with a kind of mottled effect. The 450D now comes with a Image Stabilised lens (IS) which is a nice touch.

On the back of the 450D are the biggest changes, with the buttons moved around in order to accommodate the new slightly larger 3 inch screen.

The Canon battery type has changed and the Compact Flash card slot has been replaced with an SD card, which is useful, as it seems most cameras have now gone back to SD cards, as my HD camcorder also takes SD cards.

The 450D now has 12 mega-pixels instead of the 10 mega-pixels in the 400D.

The Live View mode works in all modes except in Automatic mode, so don’t expect to use the live view just like a compact digital camera. After pressing the “Set” button to enter Live View mode you can zoom in on the object by 5x or 10x magnification, which should help with focusing whilst doing astrophotography. I think you can also get a live view through a PC or laptop, even more useful.

The standard ISO settings are still there. I would have thought we would have seen an ISO setting of 3200 available, but maybe that will be on the next model, 500D? I also think the next model will have 15 megapixels and probably an HD video recording facility. But we will have to wait and see.

Overall the 450D seems worth upgrading to if you really think you need an extra 2 megapixels or the live view mode, otherwise stick with the 400D if you have it. If you don’t have a DSLR then the Canon 450D is a great camera and worth a purchase.

The best price for the Canon 450D Digital SLR Camera seemed to be from either Dixons or Amazon when I was looking.

Federation of Astronomical Societies Convention 2008

I decided to attend my first Federation of Astronomical Societies Convention which provided me with my first whole day of astronomy talks, held at the Cambridge Institute of Astronomy on Saturday 21st September 2008.

The first talk was by Andy Fabian entitled “The Power of Black Holes”. Andy talked about the possibility of their being a black hole in the middle of our galaxy which can be viewed on ly in infrared as there is a bulge in the middle of our galaxy. He went through the history of who discovered black holes, such as John Michel who in 1784 was the first to work on the possibility of a black hole. He also talked about astrophysical black holes which have olny mass and spin and about gravitational red shift.

The second talk was by Nik Szymanek entitled “Photographing the Night Sky”, which was really why I attended the whole day, and his talk did not disappoint, with lots of amazing astrophotography images in the talk and his talk also contained an 8 minute video. I think in the future I would like Nik to get a bit more technical and actually tell us exactly how to take his type of magical photographs.

Another talk was by Barrie Jones entitled “The Seach for Extra-Terrestrial Life”. This talk covered the search for Exoplanets, which are mainly found by radial velocity. He also told us about what needs to exist on the planet to allow us to find a habitable planet, such as temperature, carbon and water together or ozone and oxygen photosynthesis or oxygen and methane.  For us to find technically intelligent aliens they need to have binocular vision, hands and brains.

The final talk was by Somak Raychaudhury entitled “Einstein’s Outrageous Legacy – Black Holes, Cosmic Illusions and Dark Energy”, but I did not stay for this, as I think I had already seen the speaker at a Cambridge Astronomy Association night.

There were lots of stalls in the main foyer, including stalls from Astronomica, Green Witch, Cambridge University Press, Nik Szymanek and many other book stalls as well as stalls from the national and other local astronomy clubs.

The Sun through a Coronado PST TelescopeGreen Witch set up a Coronado PST telescope outside which many people used to get their first view of the Sun, this is the image I managed to get by putting my Canon 400d up to the eyepiece of the Coronado PST.  There was a really good solar flare coming from the Sun but this does not seem to have come out on the photograph.

Tea, Coffee, soft drinks and biscuits were served all day long, never have I drunk so much tea in one day! The weather was perfect and during lunch there was a tour around the on-site telescopes. Here are some photographs I took of the various domes, namely the Northumberland, 32 inch, Schmidt camera telescopes as well as the Institute of Astronomy library building.

Schmidt Camera Dome Northumberland Telescope Dome Institute of Astronomy Library Building 36 Inch Telescope Dome

There was also an imaging competition, as well as a raffle. Overall a good day out and I am glad I attended, especially as the location of the day was local for me.

New Planet Orbiting another Sun

New Sun and PlanetAstronomers have captured what is believed to be the first image of a planet orbiting another Sun.

A dramatic photograph shows the star, 500 light years away, as a blazing fireball. At the top left of the picture is an orange speck that scientists strongly suspect is a giant planet.

Astronomers have calculated that the “companion” is eight times more massive than Jupiter and a long way out from the star – 330 times the distance of the Earth from the Sun. To classify as a planet, the object must be orbiting the star.

Canadian astronomer Dr David Lafrenicre, from the University of Toronto, who led the Gemini Observatory team that made the discovery, said: “This is the first time we have directly seen a planetary mass object in a likely orbit around a star like our Sun. If we confirm that this object is indeed gravitationally tied to the star, it will be a major step forward.”

Until now the only planet-like bodies to be photographed outside our Solar System have either been drifting freely in space or orbiting “brown dwarfs”. These are dim pseudo-stars which are too light to maintain the hydrogen-burning fusion reactions that power the Sun.

Since the 1990s astronomers have detected more than 300 “extra-solar” planets in other star systems.

The most common method used is to look for the way a planet’s gravity causes its parent star to “wobble”.

Another technique is to measure the drop in brightness of a star when a planet moves in front of it. Powerful space telescopes due to be launched in the next 10 years will make it easier to “see” planets outside the Solar System. The technology should also make it possible to analyse their atmospheres for signs of life. The image captured by the Gemini Observatory provides a first taste of what may be to come.

Could this planet be a new home for us? Could the planet be the correct distance from the Sun to be inhabitable?

Digital Astrophotography Book Review

Digital Astrophotography BookDigital Astrophotography is a very clear, up to date and concise book on how to accomplish digital astrophotography.  The book details four main ways to take images, either via a digital compact camera, a webcam, with an SLR/DSLR or via a CCD camera.

It was refreshing to read a book which was up to date with some really nice colour screenshots and image included.  Most of the other books on astrophotography have not been updated, as they only discussed using either early webcams or manual SLR cameras.

Each chapter of Digital Astrophotography covers digital compact cameras, SLR cameras, webcams and CCD imagers. In each chapter you get information on the type of equipment, what to look out if you are considering a purchase, and how much you will likely pay (in dollars) for the equipment. Finally there is a table detailing the advantages and disadvantages of each piece of equipment.

Each piece of equipment is then covered in detail, including how to set up your piece of imaging equipment and how to take images, and how to process them. For example in the webcam chapter you are instructed how to set up and use the Philips SPC900 webcam and how to use VLounge, Registax software and Photoshop in order to obtain your finished images.

The final part of the book takes you through using the software program AstroArt to manipulate your astrophotography images. There is also a website to accompany the book which contains images you can download to practice on and follow the examples with.
 
Overall Digital Astrophotography by Stefan Seip is a brilliant book and one I read cover to cover.  If you are after a beginner’s type book about digital astrophotography and you want to learn how to image using a compact camera, webcam, DSLR or CCD imager then I can recommend this book.

How to use a computerised telescope is available at Waterstones

Rainbow Spotting

During heavy rainfall and Sun at the same time on Friday 22nd August 2008, at around 6pm, I looked around the sky for a rainbow, and there it was at the back of my house, with more bands of colour than I can remember ever seeing.

Rainbow Colour Bands“A supernumerary rainbow is an infrequent phenomenon, consisting of several faint rainbows on the inner side of the primary rainbow, and very rarely also outside the secondary rainbow. Supernumerary rainbows are slightly detached and have pastel colour bands that do not fit the usual pattern”. Is this photo below a supernumerary rainbow? It does seem to have a lot of colour bands.

Double Rainbow

The main image even shows a second rainbow trying appear above the main one, this is called simply a double rainbow. Two rainbows in the same sky is also something I have never witnessed before.

Apparently secondary rainbows are caused by a double reflection of sunlight inside the raindrops, and appear at an angle of 50°–53°. As a result of the second reflection, the colours of a secondary rainbow are inverted compared to the primary bow, with blue on the outside and red on the inside.

It is remarkable how quickly a rainbow can appear and how quickly it can fade away and lose it’s intensity and the number of bands of colour.

Rainbows are optical illusions and meteorological phenomena that cause a spectrum of light to appear in the sky when the Sun shines onto droplets of moisture in the Earth’s atmosphere. They take the form of a multicoloured arc, with red on the outer part of the arch and violet on the inner section of the arch. More rarely, a secondary rainbow is seen, which is a second, fainter arc, outside the primary arc, with colours in the opposite order, that is, with violet on the outside and red on the inside.

National Space Centre Visit

National Space Centre Rocket TowerMy family and I visited the National Space Centre at Leicester in August 2008. I decided to go once I found the venue on the Tesco Clubcard site, so if you are a Tesco customer, then I recommend trading in some of your Clubcard points and save some money on entrance (if the Space Centre is still on the Tesco Clubcard site), also be ready to pay £1 for parking, but the price covers the whole days parking.

You can see the National Space Centre in the distance when driving to it as the main rocket tower stands out on the horizon. The tower actually contains two full size rockets, and you can actually have your lunch underneath the rockets in the restaurant.

Soyez in receptionAt the entrance you are greeted by a hanging copy of one of the Soyuz satellites. After getting through the turnstiles you are then in the main exhibition areas, with each zone containing a new space topic. You can see space suits, astronaut menus, models of the ISS and more. 

The main draw for me was the planetarium, and I think it was the best thing, we got one free visit to it which is included in the entrance price, other showings are charged at £3 each.

The main show in the planetarium was called “Life of stars” this was amazing with spinning objects that made you dizzy and introducing you to the history of astronomy, and the planets and our solar system and it was narrated by Mark Hamill.

I did attend another show entitled “Guide to the night’s sky”. The lights where turned down and the stars lit up, the narrator Becky, introduced us to several constellations and stars and the history behind them, great if you want to learn the basics about the night’s sky.

We also attended a talk on a future rover mission which will be heading to Mars called ExoMars.

Looking up at the rocket towerThe rocket tower not only includes two rockets but also has various things to see on each of the 3 levels via an open glass lift, this includes some real space engines, a Beagle 2 presentation and suspended satellites as well as other interactive games. 

There was absolutely lots to do including playing with a remote control mini Mars rover, and watching some funny footage from the original Moon landing, as well as lots of interactive learning. There was also a great display of Heinz Beans cans which were all weighted according to what planet you were on.

The final part of the centre is a space astronaut cadet training area which includes a 3D space ride a bit like a ride from a Florida theme park, which should not be missed. There were also other challenges such as collecting as many space rocks as possible using a mechanical digger in a set time.

The National Space Centre is a great place for children to learn about the solar system, as there are a lot of interactive learning tools scattered around the centre, and even Lunar Jim sections for younger children.  But don’t think it is only for children, as there is a lot here for adults as well.

Even the hand washing facilities in the toilets were futuristic as you put your hands in a hole in the wall and the soap is dispensed and then comes the water and then the dryer, all in one.

There is also the shop near the exit which stocks a range of astronomy gifts, learning toys and more.

Overall a great day out for astronomers young and old.

View all my photographs from the National Space Centre.

The Magnetic Sun

“The Magnetic Sun.” Dr Alice Courvoisier was the title of the August 2008 Cambridge Astronomy Association talk. 

A diagram of the sun explained each named part of the Sun including the photosphere, chromosphere, filament, convective zone, radiative zone and prominence.

It was also explained to us that the solar material in the Sun is a plasma and so conducts electricity.

The lecture included of course sunspots, and it was interesting to find out that the actual recording of sunspots did not begin until 1610. William Herschel thought that sunspots were openings in the Suns atmosphere.

The centre of a sunspot is called an Umbra whilst the outer part is called the Penumbra. The Umbra appears darker as it’s cooler than the other parts. We were also told that sunspots appear in pairs which have opposite polarity. There is an 11 year sunspot cycle and the polarity of the sunspots also reverses after 11 years.

The talk then asked the question can we predict solar activity? This section ended by quoting “At the moment there appear to be too many uncertainties in the current solar cycle models to allow for sound predictions”, which was taken from a Nature article.

We were told that solar winds are when the Sun expels a million ton of particles which are threaded by magnetic fields.

Solar activity can also cause problems for us on the Earth, as geomagnetic storms induced by solar events can interrupt radio, satellites, cause power cuts and damage pipelines. . In March 1989, 6 million Canadians lost power for 9 hours because of the Sun’s magnetic activity.

Overall this was an interesting talk that taught me more about the Sun than I knew.

Alice first came to the UK to follow a masters course at Cambridge University in 1999. Then, after a two year break teaching physics in Madagascar, she came back to do my PhD in the Department of Applied Mathematics at Leeds University, which she completed in 2006. Alice is currently working as a post-doctoral research associate in Leeds; where her main interest is trying to understand the origin on large-scale magnetism in astrophysical bodies.

How to attach a Camcorder to a Telescope

After buying my Panasonic SD9 HD camcorder I was thinking if it could be used for astronomy. I wondered if I would have to take a trip to my local astronomy store to see if they had anything in stock to allow me to connect my camcorder to my LX200 telescope.

In the same way you use a Ring on an SLR camera with a T mount I thought there may be the same thing for my camcorder, I definitely did not want one of the metal contraptions that are used to attach compact digital cameras to telescopes (more commonly known as an Ultra Afocal Digital Camera Support).

37mm T-mount adaptor to attach camcorder to telescopeThe Panasonic SD9 camcorder has a 37mm thread. Luckily I took a chance and ordered an adaptor, and I am so happy to say it worked. It is a 37mm adaptor to a T-mount. Which means that you can connect it to the Meade T-adaptor or any other connections such as a focal reducer and then onto the telescope.

Camcorder with T-mount 37mm adaptor attachedThe SD9 camcorder allows you to screw in the 37mm adaptor directly to the front of the camcorder, as shown in this accompanying image, although there is only space for the adaptor to be threaded on for about two turns.

Although there is another way to connect the adaptor to the camcorder.

Camcorder Lens Cover Removed and Tmount adaptor attached directlyIf you unscrew the silver lens cover there is a deeper 37mm thread depth available underneath it, and the adaptor can be attached to this, as shown in the image. 

The only downside to doing this is that you must be careful to not damage the camcorder lens as there is no protection for it. 

With there being a chance of scratching the lens whilst out in the dark fumbling about, I have ordered an UV 37mm screw-in lens for the camcorder in order to protect the camcorders lens.

Now I just need to try and do some videoing with the camcorder attached to the telescope to see what I get.

Panasonic HD SD9 Camcorder Review

Panasonic SD9 CamcorderI have at last purchased a new digital high definition camcorder. I chose the Panasonic SD9 HD camcorder for it’s size, weight and functionality as well as price. I purchased it through Amazon and got a free 8GB SDHC card with it.

Once it arrived I was amazed by the small size of it and how light it was, especially compared to my 1st 8mm camcorder I bought 15 years ago which is now out of service.

This now means I have another option for recording astronomy, not just my webcam, Meade DSI Pro or Canon DLSR. The first thing I need to figure out is how to attach the SD9 camcorder to my telescope. I am hoping to find a simple 37mm threaded adaptor which will fit directly onto the front of the camcorder which will allow me to connect the other end as 1.25″ or 2″ eyepiece.

The manual mode of the camcorder does allow you to change the shutter times from 1/25 to 1/8000. This was useful for those night shots, especially when shooting the footage below that I took of the moon, which I took using a 1/4000 shutter speed via a tripod on full zoom which is 10x. You can also change the apeture setting as well. (From viewing these videos you will see that the viewing ratio has changed in YouTube as the moon looks a bit elongated, plus note you will not really see the HD quality on these videos).


There is a larger zoom than 10x, but this is digital and you lose quality and gain pixelisation when using digital zoom, so it’s not recommended to use it, and a good thing is that in the menu you can actually turn off the use of the digital zoom.


Viewing the files recorded in the AVCHD format is tricky, Windows Media Player will play the files but you may need to install special codec onto the PC to get it to work. Each file is located in a folder called “stream” as an .MTS file.

There is a supplied CD which allows you to first download the video footage to your PC and then edit it via an included program, which can output your video as MPEG2. Though as you have probably seen from the YouTube videos that the ratio is different as YouTube has squashed the videos.

The quality of the recordings are very good, the picture is clear and the sound good, but at the moment I don’t have an HD TV though, so I am probably not getting the best from the camcorder.

 There are other accessories to buy though such as macro lenses, so I have an idea of using the camcorder with a macro lens on and to record meteor showers by leaving the camcorder on a tripod and recording for 2hrs at a time, so then I should hopefully then get some footage of some meteors.

So far I can thoroughly recommend the Panasonic SD9 camcorder, the only downside at the moment is that spare batteries are hard to find and expensive. 

I purchased my Panasonic SD9 from Amazon, which I think was the cheapest although, it can be purchased from other online electrical retailers such as Currys and John Lewis.

My Solar Eclipse Photo on ITV Anglia News

My partial solar eclipse photo was also picked up by ITV Anglia News on the evening programme on 1st August 2008.

Thanks to Anglia News for sending me the video, as I missed it on TV.

My photo is the first image (Daniel Coe, Ely).