My Nights Viewing on 18-07-07

At last after what seems forever there was a clear night on the 18th July. The only problem was that because it had been raining earlier in the day the dew level was amazing.

The telescope was absolutely soaking, and I was more worried for my laptop and new Canon 400D – but I had to make the most of the clear skies.

I played about with the Canon 400D and tried out my new T ring and adaptor, I started looking at Jupiter and inserted a 9mm K9 into the camera adaptor but the focus was not great, so I went back down to 15mm Plossl and took some photos, the best of which is below:
Jupiter with Canon 400D 15mm Plossl 130N
I still have a problem with getting blurry images, because my mount and telescope is not motor driven.

Then I tried to take some pictures of the heavens with the Bulb setting on my Canon camera on my other tripod, but everytime I tried to open the shutter for a set amount of time, but the camera just made a backward and forward noise and that was it, so I went into the garage and turned the light on and the Bulb function began working, I could not figure this out, so I asked a question on CloudyNights and I have found out that when outside in the dark I need to change the lens on the camera to MF – Manual Focus instead of AF Auto Focus – which I had it on – never mind, you live and learn!

Finally I retreated off of the wet grass and onto the patio and went hunting for my first site of the Ring Nebulae. Well after star hopping and with help from Starry Night Pro, I managed to actually find it, I have no photo to show you, but I was amazed to have found it! It did not look as good as you sometimes see it in books, as my poor old 5″ 130N was not really up to the job, perhaps I need an LX90 and fast!

Add Astronomy Adaptor to Philips SPC900 Webcam

Adding the Adaptor to the Quickcam Pro 4000 meant you had to unscrew the webcam and take it apart first, but luckily the Philips SPC900 webcam is really easy to take apart and add your eyepiece adaptor to.

Remove monitor clip

The large plastic clip on the webcam can be removed, there is no screw or anything you can really break here, just pry and pull the long plastic clip away from the webcam.

Below is a picture of the clip after it has been removed.

Remove SPC900 Monitor Clip

Remove outer lens cover

First of all you will need to pry off the outer lens cover of the SPC900, I did this myself with a small jewellery type screwdriver – the smallest I could find. You may be able to see from the photos that I did manage to slightly scratch/indent the plastic where I inserted the screwdriver.

Remove outer lens cover of SPC900

After you get the screwdriver in, just gently pull out the lens cover, which once out completely, looks like the image below.

SPC900 Outer Lens Cover

Unscrew the main lens

Now just unscrew the main lens cover until you can take it out.

SPC900 without outer lens cover

SPC900 Lens

Remember – do not leave the sensor open to the air for too long as dust could get in. So have your eyepiece adaptor ready.

SPC900 without lens

The image above shows the webcam with no outer lens or main lens, and it’s now ready to have the adaptor added.

Insert SPC900 Webcam Eyepiece Adaptor

Now just screw in your eyepiece adaptor, the one I have fits really well. When you purchase your webcam eyepiece adaptor make sure you purchase the adaptor which is made for the SPC900 luckily this also fits the Logitech Quickcam Pro 4000 and 5000.

Once you have finished you will have your eyepiece adaptor ready for use. Mine is pictured with an extra screw-in clear lens to keep the dust away from the webcam CCD sensor.

SPC900 Webcam with Eyepiece adaptor attached

Cover white light on webcam

The Philips SPC900 webcam has a white light which comes on when the webcam is in use which is very bright and annoying when out in the dark. Some people have used a black felt tip and coloured it in, instead in the photo below I have just added some blu tak and placed it over the light area, just in case I ever want to use the webcam as a normal webcam or even sell the webcam at a later date.

Cover SPC900 White Light with Blutak

SPC900 Webcam has common screw mount

A nice thing about the Philips SPC900 webcam is that it has a screw-in mount socket, so you could always screw the webcam into a mini tripod or even a regular large tripod if you so desire.

Remove SPC900 Monitor Clip

Where to purchase the Philips SPC900 in the UK

I purchased my Philips SPC900 from Amazon, but Pixmania also sell the webcam. In 2007 mine cost £46 delivered through Amazon.co.uk. Other companies did stock the webcam but it did cost a lot more from them.

Overall Initial Impressions

After using the webcam once – compared to the Logitech Quickcam Pro 4000, the Philips SPC900 does seem to be a lot better for Astronomy use, even though both have CCD sensors.

The VLounge software that comes with the SPC900 webcam gives you a lot more control of the webcam – such as being able to change the brightness, contrast, gamma, shutter speed, frames per second and much more. You will need to play with these settings to get the best out of the SPC900.

Star Ware Book Review

Star Ware BookStar Ware (ISBN 0471750638) is now in its fourth edition, this is maybe because star ware instructs amateur astronomers on how to choose telescopes and accessories and how to use them, and the technology behind telescopes and accessories is always changing with new versions of telescopes and lenses being released all the time.

Star Ware is a very useful book and one that I enjoyed reading as it covers the technology products that we as amateur astronomers look at buying everyday. The author is American so all prices are in dollars, and some versions of telescopes and accessories may not be available in the UK, so this is something to remember when reading the book.

I would say that about half of the book is given over to discussing the various pros and cons of telescope types, models and mounts. Although the beginning of the book is given over to discussing how the various types of telescopes work and a little bit of history behind them all.

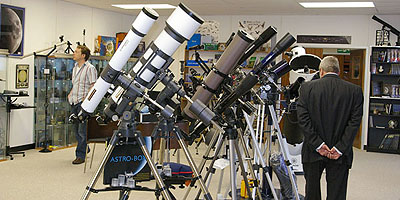
Star Ware makes you think about what type of telescope you want to buy, by asking what you want to see with the telescope and how much you have to spend etc. All the major makes and models of telescope are included, such as those from Meade, Celestron, Orion, Astro-Physics and many more. All the various types of telescope are also covered including Reflectors, Refractors, Catadioptric telescopes and the various mounts used with each.

Star Ware contains an extensive chapter on eyepieces. This chapter teaches you the basics of how the various types of eyepieces work and then it reviews the various manufacturers of eyepieces, and eyepiece accessories such as barlow lenses, binocular viewers and focal reducers.

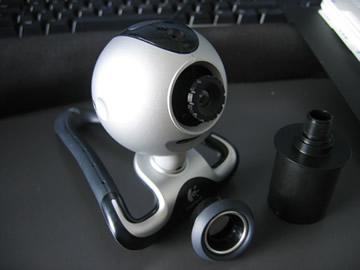
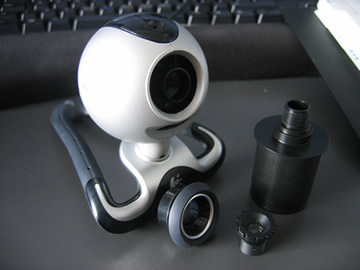
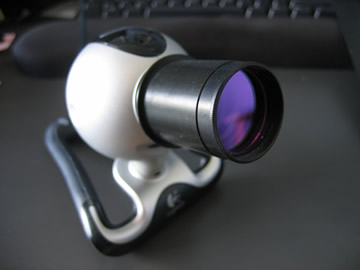
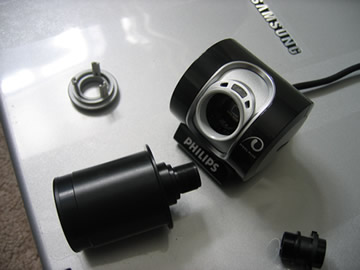
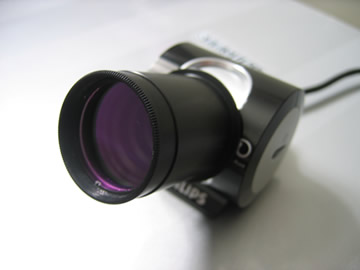
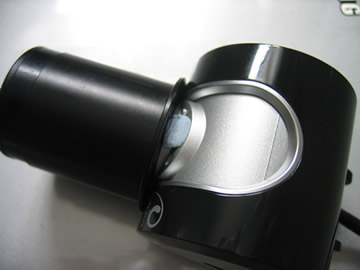
There is also a hefty chapter on astronomy accessories you may want to purchase including finder scopes, filters, star diagonals, eyepiece cases, books, periodicals, computer software and digital setting circles. There is also a great section on what you may want to look out for if you want to perform some astrophotography, including information on cameras, webcams, CCD cameras and photographic lenses.

Star Ware even includes information on observing chairs and observatories. There is even a really nice chapter on DIY astronomy, which tells you how to make your own swinging table, various observing chairs – the LYBAR chair and Ron Boes chair, a lazy laser collimator, a simple dew heater, vibration suppression pads, a simple accessory tray, an equatorial table, and even a skywatcher observatory shelter. So there are loads of DIY projects for you in this book if you fancy giving them a go.

Star Ware also has a useful chapter on how to set up your telescope and various mounts after you have unpacked your new telescope, as the author Philip Harrington knows how a lot of telescopes arrive with useless instruction manuals. This chapter also covers how to clean your telescope and mirrors, also how to collimate your Newtonian telescope or Schmidt Cassegrain telescope.

The final chapter entitled ‘Tricks of the Trade’ shows you how to evaluate sky conditions and how to traverse the nights sky, by star hopping or by using setting circles and how to polar align your telescope.

Overall the nice thing about Star Ware was that it just covered the hardware of astronomy and did not talk too much about the planets and the universe. But also the book was not just about telescope hardware and accessories but it did also tell you about how the various pieces work and the author provides his thoughts on various makes and pieces of equipment.

It was also nice to see some tips on how to set up telescopes, polar align, star hop and have lots of tips on various subjects including traveling with your telescope, storing your telescope and maintaining your telescope.

Star Ware was a book I thoroughly enjoyed reading and a book I would pickup again for reference in the future. Star Ware did not contain a great deal of images but just the right amount, the only drawback for UK readers was that prices and hardware models were all based on the US.

Star Ware is available at Waterstones

Philips SPC900 Webcam Arrived

Just a quick post to tell you all my Philips Webcam SPC900NC arrived today. It appears that all Pixmania products are shipped from France. Anyway I have managed to take the webccam apart and screw in the webcam adaptor, now I just need a cloud free night to give it a go and compare it against the Logitech Quickcam Pro 4000.

I shall also add a post on how I took apart the SPC900NC/00 and screwed in the adaptor, also about how the installation went on my laptop and where to get the latest drivers etc

Skywatching Book Review

Skywatching BookSkywatching (ISBN 0002200287) is an all rounder type of astronomy book which claims to be the Ultimate Guide to the Universe. This is the type of book a grandmother or aunt would buy you for your birthday or Christmas once they have learnt that you are interested in astronomy but this is not a bad thing, as Skywatching is a very colourful book with lots of very useful content and images.


The first chapter of Skywatching gives a very good guide to sky watching through the ages, including the first sky watchers such as the Babylonians and the Chinese astronomers. This chapter also mentions Copernicus, Kepler and of course Galileo. Milestones during the 20th Century are also nicely covered from Einsteins publishing of relativity in 1905 to 1994 when the periodic comet shoemaker Levy 9 collided with Jupiter.

Chapter two covers stars and galaxies, including dwarf stars, giant and super giant stars. This chapter also covers a wide range of sites to look for in the sky including nebulae, star clusters and galaxies such as M31, M33, M81 and M87.

There is also a chapter on Skywatching Tools and Techniques; this covers naked eye astronomy, observing techniques such as using red lights for outdoor viewing and measuring sizes and distances using your hands. This chapter also takes you through using binoculars for astronomy and the different types of binoculars. It also contains information on the different types of telescopes and which is the right one for you. There is also a small section on eyepieces and on astrophotography and large telescopes.

Chapter four entitled Understanding the Changing Sky, takes you through how to map the stars and how the earth spins and how the seasons are created. This chapter also discusses the phases of the moon, star brightness and colour, and solar and lunar eclipses, it also covers shooting stars and other lights in the sky such as rainbows and aurorae and haloes.

Chapter five is a very large chapter which shows you how to use starfinder charts and it then goes on to describe each constellation in turn with a page for each, including a description and what to look for as well as a sky chart for each and what other exciting sites can be found in that constellation.

Chapter six is a tour of the solar system and there are some great pictures and write ups about each planet and our moon, this chapter also covers comets and asteroids.

This version of Skywatching that I am reviewing was reprinted in 1996, so that is quite an old book, but a lot of the content is still the same today, we still have the same constellations and planets to view, it maybe that we have now discovered more in the sky and technology has now improved, but Skywatching from Collins is still a very good book, what makes it especially good is because it is so readable and gives you the information without bogging you down in science, plus the number and quality of images in the book are great.

Skywatching is the type of book for amateur astronomers who would go back and use the book as reference again and again.

Skywatching is available at Waterstones

Setting Circles – Good, Bad or Ugly?

As a very amateur astronomer I find it hard to locate objects in the sky, it could be me or my Meade Bresser 130N, but anyway, I tried polar aligning the telescope last night to Polaris and set the latitude to about 52 degrees, then reset the declination to 90 degress, or on my scopes mount 9 – is this right? I then set the RA to 0 – is this also correct??

I then chose a close star in Ursa Major (Plough) and moved the telescope using the dials on the mount to the correct RA and Dec as seen in Starry Night Pro, but on arriving at my star I found my telescope to be pointing in the wrong location, after manually correcting the telescope myself onto the star, I then looked down to the mounts RA and Dec settings to find that the Dec was correct but the RA was about 2hours out – well I think it was two hours as the main points on it are I think in hour segments and within those are 6 markings, which I imagine to be ten second markings. Maybe I was not correctly on Polaris in the first place – who knows!

It appears to me that the mount is ok for losely pointing you in the direction of the sky you need to be in, but the settings are so exactly shown in Starry Night Pro, but you just can’t get this sort of precision with these mounts. Agree / Disagree?

Has anyone else had fun setting up and using setting circles, can anyone give me advice on setting up and using them?

Ordered a Canon 400D SLR from Comet

Now I must be really getting the astronomy bug, as just a few days after ordering a Philips SPC900 webcam, I have jumped in with both feet and ordered a Canon 400D SLR Digital Camera from Comet, which was a good price as they gave me £40 off by using a code – ‘SUMMER40’ if I spent over £400 (or SUMMER30 if you spend over £30, and SUMMER20 if you spend over £20 – but that ends Friday 13th July), plus there is a cashback off on at the moment of £50 when you buy a Canon, so that should make the camera £389 with free delivery.

I went for the 400D instead of the 350D, as I thought with me constantly taking off the camera lens and adding the telescope adaptors that dust may get into the chip, but the Canon 400D has a shake clean mechanism to remove dust from the sensor, plus alot of other astronomers and amateur photographers seem to have this camera – although that does not make it good!

I then just need to purchase a nice tripod, case, remote control, memory card and of course the all important t adaptors in order to rig it up to the telescope – does this spending on this new hobby ever end?

Ordered a Philips SPC900 Webcam from Amazon

I finally went for it and ordered a Philips SPC900 webcam from Amazon, which is actually being sold through Pixmania, but the postage is less through Amazon than purchasing it direct with Pixmania – strange.

Philips SPC900NC webcamThe Philips SPC900 is costing me £46 delivered. Now after trying my Logitech Pro4000 webcam I can actually compare both the webcams when it comes to astronomy use, and luckily the webcam adaptor that I purchased for the Logitech Pro4000 webcam will still fit on the Philips SPC900.

I also noticed on my travels that you cannot buy the Logitech Quickcam Pro4000 anymore as it has been superseded by the Logitech Quickcam Pro5000, but I imagine after looking at the logitech website that the CCD chip and insides are the same as the 4000, the best price though if you are looking at the 5000 does seem to be PCWorld at around £30.

As soon as I get it and get a clear night, I shall try it out and report back with comparative images from both webcams.

As Seen on ScopesNSkies Web Site

As I live close to the ScopesNSkies store, I popped down there the other day to purchase a webcam adaptor and a 4x ImageMate to use with my Logitech Pro 4000 webcam.

I have now noticed on their website that I now have been caught on film and can actually be seen in the showroom looking round – at last I’m famous and can be found on their site!

Me at ScopesNSkies

That’s me on the left hand side in the nice stripey shirt.

Logitech Quickcam Pro 4000 & Astronomy

If you want to get into using a webcam for astronomy, then most people recommend the Philips SPC9000NC webcam, but luckily I already owned a webcam which I use for Skype, from Logitech called a Quickcam Pro 4000.

I knew that webcam adaptors existed so that you can insert the end of the webcam straight into the telescope eye piece area and then use a laptop to record your footage. What I needed to know was if the Quickcam Pro 4000 could be used with one of the stanard telescope webcam adaptors.

I decided to try and take the Quickcam Pro 4000 apart, this can be easily done by inserting a screwdriver into only one of the holes on the webcam and unscrewing the screw in the webcam.

Now prise apart the webcam and then you should be able to take the webcams main front ring off and then unscrew the lens out of the webcam.

This image below shows the webcam after I have opened it by unscrewing it and then taking off the rubber surround, I have then just screwed the webcams lens back in.

Quickcam Pro 4000 with lens

Now you can unscrew the lens from the webcam, which will leave the CCD sensor open to the air. It is advisable to not let a lot of dust get into the webcam, so do not leave the CCD chip in the webcam open to the air for too long.

Quickcam Pro 4000 Webcam without lens

I then purchased a webcam adaptor for £20, luckily the webcam adaptor I required for the Quickcam Pro 4000 was the same webcam adapter which is used for the new Philips SPNC9000 webcam.

Logitech Quickcam Pro4000 with Telescope Adaptor Fitted

You can also purchase ends for the adaptor or filters that screw into the end of the webcam adaptor in order to protect the CCD sensor from dust.

Now you are ready to try your webcam in your telescope and get some photos and video.

All you need to do is insert the adaptor end into the telescope eyepiece area, and use some video capture software to get some great images.