Bahtinov Masks Review
I have heard so much about Bahtinov masks lately on the web and in magazines, so I thought I should check them out for myself.
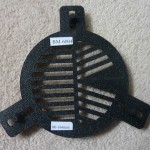 Bahtinov masks designed by Pavel Bahtinov, basically aid you when focusing your telescope for either visual or imaging use. They appear to be an improvement on the Hartmann mask (which I also own but I only use it to hold a smaller screw-in solar filter). The Hartmann mask (if you have three holes in it) will produce three blurry images of your target, and then once you bring the object into focus, the images merge into one. But the Bahtinov mask is a far superior focussing aid than the Hartmann mask as it uses diffraction spikes to help you with your focussing.
Luckily Bahtinov masks come in a variety of sizes from 80mm to 12”+ sizes, as I have two scopes, one is an 80mm and the other my 10” LX200, prices vary on size.
I got my hands on an 80mm size Bahtinov for my Skywatcher ED80 Pro telescope from Green Witch.
The Bahtinov mask itself was made by the Canadian company Kendrick, their version is quite flexible and comes with three rubber type bungs which hold the mask in place, as I have seen a lot of Bahtinov masks sold with just the mask and no fixings.
My Meade 10” LX200 Bahtinov Mask came from the astronomy retailer SCS Astro.
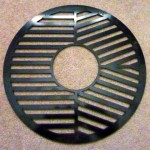 This mask was made by a company called FarPointAstro.
The design of this mask is very different from the smaller 80mm Bahtinov Mask as this larger mask does not have rubber bungs, but slips onto the secondary mirror hub on the front of the telescope.
So it is really easy to slip it on and off of the telescope, a great design.
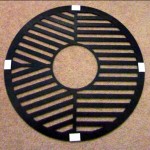 I actually decided to amend the design of it slightly by adding some white adhesive pads to each corner of the SCSAstro Bahtinov Mask. I did this to raise the height of the mask away from the main glass on the front of the telescope so I had less chance of putting fingerprints on the front of my telescope glass.
You begin by directing your telescope towards a star and then place the Bahtinov mask over the end of your telescope. The Bahtinov mask then produces three sets of spikes. The great thing is that the position of the spikes will tell you all you need to know about how well your telescope is focused.
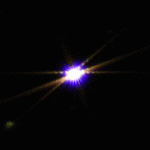 If you change the focus knob you on your telescope you will see that two of the spikes stay in the same place, acting like a cross-hairs, whilst the third spike moves up and down across the image. Once the moving spike is centered you are in focus, simple.
Then lock your focus in, and remove your mask and then start observing or imaging. If you need to re-focus just follow the same procedure again.
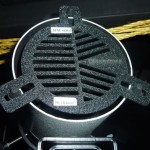 One of the benefits of these masks is that they are so light and are easy to place on the end of your telescope, so there is little chance of you moving your scope when attaching a Bahtinov mask.
Most good astronomy retailers now sell Bahtinov masks in various sizes for all of the most popular telescope sizes. My Bahtinov masks came from Green Witch and SCS Astro and both were very reasonably priced, you can find the range of Bahnitov Masks at Green Witch here and Bahtinov Masks at SCS Astro here.
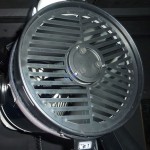 This is a photo of the SCSAstro Bahtinov mask on my Meade 10″ LX200. It’s easy to fit and easy to remove once your telescope is focused.
If you really want to make your own Bahtinov mask (which can be very fiddly to cut out and a lot of effort is required) then you can get an image file off of the internet which can be sized in a photo editor program to fit your scope and then the template can be printed out. The choice of raw material for the mask would be up to you.

