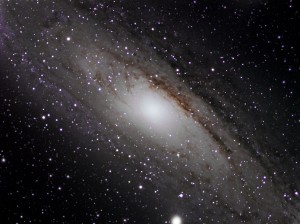
M31 Andromeda Galaxy Image

This image of M31 the Andromeda Galaxy is usually seen as quite an easy target to image, especially for beginners like me. The main problem with it, is that it has a very bright core, but using DPP in Maxim soon sorted this out.

M31, Andromeda Galaxy was imaged using my Skywatcher 80mm ED-Pro telescope and guided with the attached 9×50 finderscope using a QHY5 camera all mounted on an EQ6 mount.

I took L,R,G,B images through Astronomik 1.25″ filters, the camera used was an Atik 314L+

Lx13,Rx10,Gx8,Bx10 all for 300 seconds (5 minutes).

Once they had been calibrated and aligned in Maxim DL, I used a DPP filter with a custom cutoff of something like 50%. I then used FITS Liberator to convert and stretch into TIFF files. Then imported into Photoshop and used curves, levels, high pass filters and various other filters to remove dust and speckles etc.

Another quick Jupiter

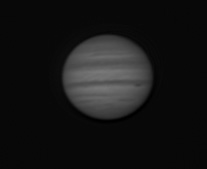
After doing some deep sky imaging I turned the scope onto Jupiter again and did some quick imaging through the 120ED with the Televue 2x Powermate and DMK21 camera. Small image, but I like to see the detail.

Planisphere

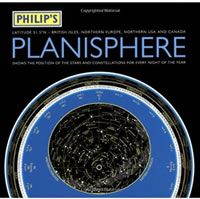
Last year after BBC Stargazing Live one of the most popular items was the Philips Planisphere, which Jonathan Ross used on the show to find the stars in the sky.

The Planisphere is the perfect tool for any amateur astronomer. It comes with full instructions on its use, so you can have a quick look at it and be out inspecting the night sky in only a few minutes.

The planisphere also explains how to find the major planets (Venus, Mars, Jupiter and Saturn), sunrise and sunset as well as the positions of the constellations, season by season. Luckily, many of these instructions can be found on the back of the Planisphere itself (along with a Key to map symbols) so that you can always flip it over if you get stuck.

The Planisphere itself is sturdy, flexible and laminated so it won’t be affected by wet surfaces – which is useful if you find yourself outside and there’s a change in the weather. This makes it superior to any cardboard version.

Buy the Philip’s Planisphere from Amazon, makes a perfect Astronomy Gift for someone who wants to learn the night sky.

Philip’s Planisphere for British Isles, Northern Europe Northern USA and Canada

Jupiter November 2011

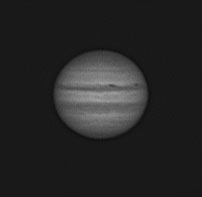
It’s been a while since I imaged Jupiter, and I have never imaged it since I got my Skywatcher 120mm ED refractor.

This was taken with a mono DMK21 camera and stacked in Registax 6. It was taken using a Televue 2.5x Powermate. I did try a 5x Powermate but the image was too blurry even once stacked and sharpened using wavelets.

It’s a small Jupiter, but perfectly formed!

FocusMax now behaving itself again

After FocusMax not working as it should after I installed ASCOM v6 and the latest FocusMax version, FocusMax v3.4.0 now works perfectly tonight.

All I did was remove ASCOM v6 and put v5 on, then tried lots of different FocusMax versions – still no joy. I then decided it could not be ASCOM, so put v6 back on again. I then re-installed FocusMax v3.4.0 and now its fine tonight, although it did not work the other day. My PC must have a mind of its own or the pixies have been working overtime in the observatory at night.

IC5146 – Cocoon Nebula

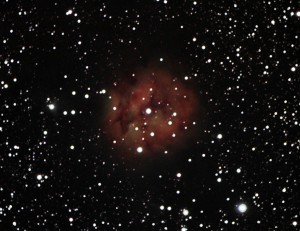
IC 5146 (also known as Caldwell 19, Sh 2-125, and the Cocoon Nebula) is a reflection emission nebula in the constellation of Cygnus.

This image was taken using my 120ED refractor, with my William Optics 0.8x flattener and Atik 314L+ CCD camera, cooled to -10 degrees. I used my Astronomik LRGB filters. The luminance layer was taken using a Hydrogen Alpha (Ha) filter and I took 7 frames of 10mins each, and then did R,G,B – 7 frames binned for 5 mins each.

Cocoon Nebula

I spent about 2hours in Photoshop on it, but still not really happy with it, it’s not as sharp as I would have liked, and I think the stars are a bit bloated. I did try some tricks to reduce the star bloat but they did not make too much difference. It’s all a learning curve!

FocusMax not behaving

After the easy upgrade to ASCOM v6 and the install of the latest FocusMax it now turns out that it does not work anymore.

The thing is now I don’t have a copy of ASCOM 5.5 anymore and I can’t fine a copy online either. I do have ASCOM v5.0 as that may be worth a try.

The thing is all I did was upgrade ASCOM and install the latest FocusMax and now FM won’t create a V-curve when setting up the ‘First Light Wizard’. I can’t even get it to work by using the ASCOM simulator. I think I need to get back to the Yahoo FocusMax Group and ask them a few more questions.

I have been thinking about just using the in-built focus functionality in Maxim DL, as it seems similar. The worse thing is you cannot try to fix it and test it all out unless it’s a clear night, but you don’t want to be messing about trying to fix things – you want to be imaging or observing.

My Moon Image Published in Astronomy Now

I submitted the Harvest Moon image I took to AstronomyNow magazine (blog post here – https://www.astronomylog.co.uk/2011/09/15/harvest-full-moon/) and I am lucky enough to have had it published.

Click on the image opposite to enlarge it or view the PDF version here.

My image is at the rear of the magazine in the ‘photo gallery’ section of Astronomy Now magazine (Astronomy Now Magazine, November 2011 edition), I am lucky enough to have had a few of my images on the TV (Stargazing Live, Look East, Anglia TV) but never in a magazine.

It’s funny as this is the 1st photo I have ever sent to Astronomy Now and it got published. I just need to get in Sky at Night magazine and on the Sky at Night TV program and then I have cracked it!

It’s also seems the images that are easy to take seem to come out the best. I think I will try and send AstronomyNow magazine an image more regularly now.

You can subscribe to AstronomyNow magazine and a lots more astronomy magazines here.

ASCOM Version 6 Upgrade

I thought about it for a while, but finally decided to upgrade from ASCOM v5.5 to ASCOM v6 as I wanted to use the latest version of FocusMax and that only runs on ASCOM v6.

The upgrade is painless, go to the ASCOM website and install the v6 software straight over the top of v5, no need to un-install your old ASCOM software as the new v6 installer takes care of it.

I then checked my Starlight Xpress USB filter wheel, Atik 314L+ camera and Maxim DL, and everything seemed ok. It was not until a clear night arrived I then found a problem. Maxim would not connect to the HiTech Astro DC Motor Focus controller.

So I looked on the HiTech Astro site but they said all their drivers had been tested on ASCOM v6. I then noticed that the HiTech Astro DC Focuser required .Net Framework v4 and I only had .NET v2 installed. So I downloaded that from Microsoft then waited for the install and then waited again whilst it found more updates. I then re-booted the PC and found I could still not connect to the focuser in Maxim or through the Hitech Astro program. I then decided to un-install the Hitech Astro program and re-install it, still no good.

My final try was to use the ASCOM v6 diagnostics program that comes with ASCOM. It runs through all your attached devices and checks them.

About 30 seconds later it then said “There is something wrong with your HiTech focuser software do you want to fix it?” Of course I clicked yes, and it fixed it! Brilliant.

So if you are ever in a fix with something not working in ASCOM, it is worth running the ASCOM Diagonstics program.

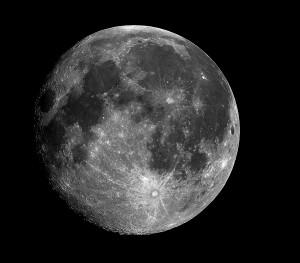
Harvest Full Moon

Decided to try and image the full harvest moon the other night. When the moon is so bright there is not much else you can image other than doing some Hydrogen Alpha imaging.

I decided to use my new Skywatcher 120ED DS Pro. It was taken with a William Optics 0.8 reducer, through an OIII filter and with my Atik 314L+ camera.

The moon was so bright I actually used a zero second exposure in Maxim DL. I took 20 frames and then stacked them in Maxim DL and then imported the image into FITS Liberator and performed a stretch. Then into Photoshop CS5 in order to manipulate the curves, levels and to add an Unsharp Mask.

Harvest Moon