Herstmonceux Astronomy Festival 2009

This was my first visit to Herstmonceux on the south coast near Hastings. I had heard so much about it and remember seeing the adverts for it last year, but I was still unsure if I wanted to drive for two and a half hours to get to the site, but I’m glad I made the visit.

After coming off of the M25 you are then driving a long a lot of tree covered single carriageway roads which have a lot of twists and turns, but once I had arrived I made out the numerous observatory domes immediately with the campsite right in front of the science centre.

Herstmonceux Domes and Tradestands

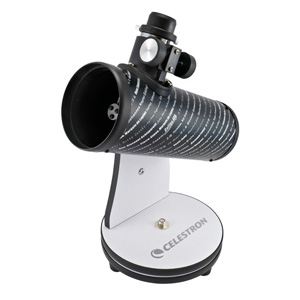
Luckily the weather was quite good, a little windy, but the telescopes on the Pulsar Optical tradestand did give visitors a view of the sun and the daytime moon.

The astronomy festival includes several tradestands from Ian King Imaging, Pulsar Optical, Telescope House and BBC Sky at Night Magazine as well as others. In a separate large tent was a collection of local astronomy societies as well as the SPA, which this year I actually joined for £12 for an annual membership which gets you a quarterly magazine, periodic newsletters and 5% discounts from astronomy retailers. They also provided me with a copy of the latest magazine, a pen and a red light pen once I joined.

The Herstmonceux site has 6 observatory domes, all were being used for various purposes during the day. One of the domes was being used for a very interesting exhibition of the history of the site underneath one of the telescopes. Another dome was the location for the talks during the day, again sitting underneath one of the telescopes. A third was open to viewing, the others were closed on the Saturday but open at other times during the weekend.

Herstmonceux Refractor Telescope in Dome E

Other amenities at the site included a beer tent, with a very nice Harvey’s bitter. There was also a canteen and lots of activities around the science centre. Herstmonceux does seem a perfect place for a school trip with a shop at the entrance and lots of science related activities in the centre.

I arrived at about the time Chris Lintott was speaking on Galaxy Zoo, but I did buy 3 lecture tickets for the afternoon, priced at £2 each. All three talks were very good, including:

  • Stuart Clark – “What’s Wrong with the Sun”
  • Ian Ridpath – “Exploring the Moon”
  • Nik Szymanek – “Imaging the Deep Sky”

One thing I must say though, is Nik please amend your talk, as I have now seen that same talk three times! Twice in Cambridge I think, and I did see your talk at the Bedford Astroblast, but at that you did do a slightly different talk.

I know it is difficult to gauge your audience at these events, but I would personally appreciate a slightly more technical talk on how to take the images like yours, instead of just going through the images you have taken and your Tenerife trips.

At the end of the day there was a raffle prize draw and then extra activities during the evening session, but I instead decided to leave at about 6.30pm,  but before I left I decided to walk down to the castle in order to get a few pictures of the very impressive castle and moat.

View all the photographs from Herstmonceux

Observatory Finishing Touches

Once the roof had been put on and the opening doors re-attached, the work on the observatory was far from over.

To begin with, the next day rain was forecast, and that was the first test of the roof. I sat in the shed whilst the rain lashed down on the roof, and after a while I found I had four leaks.

The leaks came from where we had screwed in the hinges but then moved them, so the next day I was on the roof filling the holes with mastic.

I also found that I needed a lot more felt pins on the roof so hammered a load more in.

I also went to Wilkinsons and purchased a few more ironmonger bits, including some black cast handles which I have attached to the outside of the roof. I also purchased some cheap rope from the pound shop to allow me to open and close the roof.

I ended up buying some screw-in loops to tie the rope to on the inside and then push open the roof from the inside whilst keeping hold of the rope to lower the roof down onto the roof wooden stoppers which I also added to ensure the roof came down horizontally.

I then added the same rope on the outside of the roof and tide it to the black handles on the top of roof, then to close the roof, I go outside with a small lightweight aluminium ladder and push the roof closed, whilst holding onto the rope and lowering the roof back down.

I used cabin hooks and black tower bolts in order to keep the roof down. The cabin hooks attach the roof to the shed, whilst the tower bolts bolt the two roof pieces together.

I also purchased some cheap black carpet from Carpetright and put that down on top of some newspaper. I kept the carpet down by using a standard office staple gun and stapling it into the wood.

I purchased a cheap computer desk from Argos, and added a Belkin UPS so to keep everything on for a while in case the power goes off.

I have also added some shelves, very useful for keeping things neat and tidy, and I managed to purchase a wood drill bit the same size of a 1.25″ eyepiece and drill 6 holes in the shelf in order to hold my eyepieces.

I also purchased some cheap 3m USB 2.0 extension cables from eBay so that I could run these cables under the carpet from the PC to the telescope. This means that I have usb sockets ready to use around the wedge, useful for setting up webcams, DSLR and CCD imagers, plus they were only about £1.60 each.

Satellite Tracker

Satellite Tracker is a very useful freeware Windows program which can connect to an LX200 and it allows you to track and view satellites with your telescope, including the ISS.

The satellite tracker software was a hard program to find and download, I actually got sent it by someone who sold me my Meade Super Wedge. So I have decided to put the program on my site for download, so hopefully more people can find it and use it.

Satellite Tracker for Windows

You will need to create an account at www.space-track.org in order to download the satellite data.

Download Satellite Tracker (528k)

Update 10th May 2016

I have now been told that Satellite Tracker has a new lease of life and the file above is quite old. A new version and new forum is available at: https://www.heavenscape.com/

Completing the Observatory Roof

After painting the inside of the shed all black, all the jobs had been completed except for the setting the bolts in the ground (which is another post) but first I waited a week or so for my dad to come over and help me work on the roof.

We began by taking the roof off again, and first removing the felt. I then found out I had to undo a lot of my previous work and remove some plywood sheets and polystyrene sheets in order to get to the screws that were holding the roof on.

Opening cut out of roof with jigsaw Next we decided on how large to make the overall hole in the roof. As the roof was tongue and groove wood, it was easier to let the jigsaw cut along where the wood joined itself.

Cutting out the roof was stressful, had I cut out enough? As this is a one time only cut.

We then removed the full piece of roof, but did not cut the roof in half until later on.

Roof with inner wood support I had purchased two lengths of 4 inch by 3 inch planed wood to go inside the open roof, so creating a lip and so also giving me about an extra 5cm in roof height.

As the main beams of the roof ran in one direction, the 4×3 inch wood could be screwed into that, but on the other direction where there was nothing to attach to,  I had to purchase a length of 2×2 treated wood to create some new beams, this also strengthened the roof some more.

Next came adding the felt back onto the roof in three strips and adding some beading wood to the outside to give the felt a tight fit, we also had to add extra wood to give the hinges something to sit on.

Laying on first section of felt on outer roofThe hinges were from my local ironmonger in Streatham, Cambs. I actually first went for some small ones at 450mm long, costing only £8 for 2 pairs, but as soon as I looked at them overnight I knew they were too small, so I returned them the next day and upgraded them to the 600mm hinges which were a lot more money at £30 for 2 pairs, but they were definitely the correct ones.

We then cut the main roof into half, but not quite in half, because as we had now created an inner roof we did not need to full width of the roof, so took off one section of wood, which left one rof panel slightly longer than the other.

Roof Demo a hinge in place for measuring We adjusted the jigsaw blade to cut the roof in half at 45 degrees so I had a slanted section which had to open first (the telescope side of the roof).

At this point we put the roof felt onto the roof panels, and then put on the hinges, but later we found out that the roof felt was being pulled and tearing the felt. So we had to actually cut around the hinge (gate post) end to allow the roof to open up.

We also left an overhang of felt on the section roof which comes down last to keep the rain out of the roof join. I also had to put a large line of felt nails along this line to keep it in place, especially when the roof is open and the felt is upside down defying the laws of gravity.

First outer door on roofWe then decided to put the roof back on, but not before taking off the roof panels, as now the complete roof was very very with all this extra wood we had added. So we put the roof outer on first, and then re-attached the roof panels afterwards.

To get around the problem of having a gap in the felt where the hinges are, I just put a loose line of felt over the top of the join, this was really going to be a makeshift thing just to keep out the next days forecast rain, but it has worked so well, I have left it in place.

The next day we did have a lot of rain and I stayed in the shed to watch for drips, and I had 4 leaks. They all came about because we moved the hinges once and left open holes. So I went onto the roof with some mastic in a gun and just filled the holes, and I have not had any leaks since.

Completed Roof with Hinges and Felt in place So now the roof was finished, but there was still lots more things to do, such as securing the two parts of the roof together, which I did with two black tower bolts, and fixing the opening roof panels to the main parts of the roof, which I did with brass cabin hooks.

I also found that the wide part of the hinge attachment had two screw holes that did not line up with the beam underneath, so I could not screw them to anything, so I purchased some small bolts and bolted them through the roof.

So now the roof was on, but I needed to work out how to open the roof. I have ended up purchasing some cheap plastic rope and two black metal handles which I put on each part of the roof section to tie the rope to.

I also purchased a small light 4 step ladder from Wilkinsons for £20 which allows me to open the roof from inside the shed and at the same time hold onto the rope which I also have on the inside of the shed and lower the roof down. Not forgetting that I had also added some roof stoppers on wood to the outside of the shed to hold up the roof panels when open.

To close the outside roof I stand up the ladder and push the roof closed and again lower it down with the outside rope.

There was still lots to do, such as setting the pier bolts and doing some more plywood work and painting as well as moving in.

Painting the Observatory

Once I had installed the Plywood panels, I needed to paint the walls. I was worried to begin with whether I required a grey undercoat or if I could just paint on a black one-coat paint, or should I go for the blackboard paint which is non-reflective.

In the end I purchased two tins of black paint from Wilkinsons which were about £6 each, and they were for wood and metal, (quite handy the paint went on metal as I also painted over the screws in the walls as well).

The paint hardly soaked in at all, and one coat was enough. The paint was very good and quite cheap, plus it was water based so brushes wash out easily as well.

Buy Windows 7 Now for £79.99

Windows 7 Home PremiumI ordered my copies of Windows 7 Home Premium Edition from Comet online for £44.99 each including Free Delivery.

Now the cheapest price appears to be buying it for £79.99 – that’s for the full retail version of  Windows 7 Home Premium Edition. Don’t go to Amazon and pay over £100.

Buy Windows 7 Home Premium from Misco for £79.99

Buy Windows 7 Home Premium from Savastore for £79.99

I installed the Windows 7 release candidate on my home media centre and I was amazed at first how quickly it installed, in about 15 minutes, and then how well it ran. I had to tweak the odd settings to make it sleep after recording TV programs etc, but otherwise it’s really good and I can’t recomment it enough.

It’s definitely worth upgrading to Windows 7 if you are running a Media Centre or if you have Vista and don’t like it!

I originally installed Windows 7 on a 1GHz PC with 512MB RAM. This was an old HP PC that is now in my observatory, it must have been about 8-10 years old, but Windows 7 installed in about 15 minutes and worked really well on it, I was amazed, there was also only a 64MB Graphics Card in a PCI slot in the PC.

I found that when looking at Windows 7 running on the PC it takes about 384MB of RAM to run, whereas XP does take a lot less – something like 128MB RAM, so as I had such little RAM (512MB) I did uninstall Windows 7 and go back to Windows XP. But I am still really happy with Windows 7 and looking forward to the release date.

Adding Plywood Boards to Observatory Shed

Once I had cut up the polystyrene sheets for insulation and slotted them into the recesses of the shed walls, I had ordered 7 sheets of 8ftx4ft – 6mm plywood to go over the top, these were also to be painted black.

Before I could install the plywood, I had discovered that the shed recesses were 40mm deep, but the polystyrene sheets are 50mm deep, so now the polystyrene is sticking out 10mm, so I could either cut down the polystyrene or pack out the frame by 10mm to bring it up level.

I decided to pack out the frame with pieces of plywood I cut up as well as free wood I managed to get from Travis Perkins.

Now I was ready to cut up the plywood and I panelled out the whole inside of the shed, including the inside of the door.

I also made some shutters for the window using some left over plywood and I then used more plywood to encase the surround of the base, where the pier will be going.

For my 8x6ft Pent Shed I could have done with 8 plywood sheets, but I did manage to complete the job with 7 sheets, but had to have one side of the shed wall made up of several cut pieces instead of using just one board.

Next comes painting the inside of the shed.

Insulating the Observatory Shed

Insulating the ObservatoryOnce the pent shed was erected, I then considered the insulation and the types of products I could use.

I went for 50mm polystyrene sheets which measured 8ft x 4ft, again I ordered these from Buildbase as they were a lot cheaper than Travis Perkins, at around £7.50 each inc VAT.

I also ordered some sheets of 6mm Plywood at the same time, as I wanted to cut the polystyrene sheets into the recesses of the shed and then have the plywood over the top. The plywood was the most expensive item at around £14 for a 8ft x 4ft board.

I ended up ordering 7 sheets of both, with the polystyrene cut and fitted, I had one board left over, so I actually only needed 6 sheets for the 8x6ft pent shed.

Cutting the polystyrene sheets was quite messy, and the garden now resembled in parts a snowy type of winter wonderland scene, with all the residue of the polystyrene balls everywhere. I actually cut the sheets with a saw, and it was really easy to do.

The only problem has been that the shed recesses are 40mm deep and the polystyrene sheets only come in 25mm and 5omm depth, so I now have the polystyrene sheets sticking out by 10mm.

To get round this I could have either thinned down the sheets, but a very messy job. I did think of cutting up polystyrene strips in 10mm depths, but again probably a difficult and messy job.  So I ended up cutting strips of plywood for one inner wall. I actually used 2 pieces back to back to layer up to the correct height.

On the other three inner walls I used some rough wood which came from Travis Perkins pallets, the wood actually spaces the main wood on the pallets. It was the correct width and depth, and they nicely let me take as much as this as I wanted.

So far I have insulated the whole of the shed including the door, but excluding the ceiling, I may insulate a part of this when I work out how I am going to have my roof open up, I may also insulate the main part of the ceiling with a thinner lighter silver reflective sheet, but we’ll see.

Celestron FirstScope Telescope Review

I found the Celestron FirstScope whilst on my travels around the web, and it looks like a well built mini tabletop telescope. It’s actually a mini Dobsian Reflector Telescope with a 76mm aperture and a focal length of 30cm.

Celestron FirstscopeThe write up says: “The FirstScope is a wonderful keepsake for anyone interested in astronomy. This quality Dobsonian style telescope features a 76 mm aperture reflector optical tube. The compact design makes it easy enough to take with you on your next outdoor adventure. FirstScope is also stylish enough to be a decorative fixture on your bookshelf or desk”.

Celestron FirstScope Features:

  • High quality Dobsonian style stand with a 76 mm reflector optical tube make FirstScope an ideal entry level astronomical telescope.
  • Portable and lightweight table-top design makes it easy to store, transport and setup your FirstScope Telescope
  • FirstScope is very easy to observe with, the user simply navigates the night sky by moving the tube in the direction of their desired object.
  • Stylish and decorative design makes FirstScope a wonderful keepsake for anyone interested in astronomy.

Official Product of International Year of Astronomy 2009!

Using the Celestron Firstscope TelescopeNamed Official Product of International Year of Astronomy 2009, FirstScope pays tribute to the men and women who brought us one step closer to understanding the universe around us!

In 1609, world-renowned Italian scientist, Galileo Galilei, introduced an elementary telescope to the growing astronomy community which sparked interest into the mysterious night sky for centuries to come. Four centuries later, in celebration of the International Year of Astronomy 2009, Celestron offers the portable FirstScope Telescope. The FirstScope pays tribute to Galileo Galilei and many of history’s most notable astronomers and scientists by displaying their names around the optical tube. We honor the contributions of these men and women, who brought us one step closer to understanding the universe around us.

FirstScope Specifications

Optical Design: Dobsonian Reflector
Aperture: 76 mm (2.99 in)
Focal Length: 300 mm (11.81 in)
Focal Ratio: 3.95
Eyepiece 1: 20 mm (0.79 in)
Magnification 1: 15 x
Eyepiece 2: 4 mm (0.16 in)
Magnification 2: 75 x
Weight: 1956.12 g

FirstScope Warranty

2 Years

You can buy the Celestron FirstScope at MyMemory for £54.99 inc Free Delivery.

Observatory Build – Putting up the Pent Shed

Slabs laid with Pier in placeSaturday I finished off the slab laying and painted the shed some more, to give it two coats all over. Sunday my father came to help me in the afternoon erect the pent shed, as this is definitely a two man/person job.

We began by marking out where to cut the hole in the base of the shed to leave the space for the pier. We then re-inforced the underside of the shed base with extra wood battens which I purchases separately. We did this because once we had cut a hatch in the floor, the floor lost a bit of it’s strength especially when walking near the edges of the hole.

This part actually took the longest time, as then we put the back of the shed on first, together with a side, and then the other side, and the front, all of wich went up quite quickly.

Observatory Shed in PlaceI was amazed at the actual height of the shed, I had ordered it to be 1 foot taller at the back and front, and I was worried that the Telescope won’t even see Polaris or anything else for that matter. Anyway next came sliding the roof on and then we put the felt on the roof, but perhaps next time I may put the felt on the roof before we put it on.

Then it was time to finish for day, I had left it water tight, whilst I decided and designed how I want my roof to open. Although there are still lots of jobs to do, including fixing the corner external vertical battens, putting in the windows, filling any holes, putting on the electric, touching up any bits I missed with the stain, and also get the shed lined and getting plywood put up, it’s not over yet!